Sublime Text is by far my favorite text editor. In its rich ecosystem of plugins you can find some absolute gems, and one of those is SublimeREPL which adds support for REPLs of various programming languages directly into your Sublime Text.
Swift is missing from there - but let’s add support for it!
Adding Swift syntax highlighting to Sublime Text 🔗
First of all, to make the REPL experience much more exciting, let’s add Swift syntax highlighting into Sublime Text. ST makes it really easy to add lexing and code coloring to new languages, but in this case we will not have to do anything manually, as there is already a Sublime Text plugin for that.
The package is simply called Swift and can be found here.
To install, use Package Control (if you don’t use Package Control, here are instructions on how to set it up):
-
- Open the Command Pallette (cmd + shift + p)
-
- Type “install” and select “Package Control: Install Package”
-
- Type “swift” and press Enter
This is enough to get Swift syntax highlighting. Now let’s get to the meaty part - adding REPL support
Adding Swift REPL support to Sublime Text 🔗
First you will need to install the SublimeREPL package. Again, this is done from Package Control:
-
- Open the Command Pallette (cmd + shift + p)
-
- Type “install” and select “Package Control: Install Package”
-
- Type “sublimeREPL” and press Enter
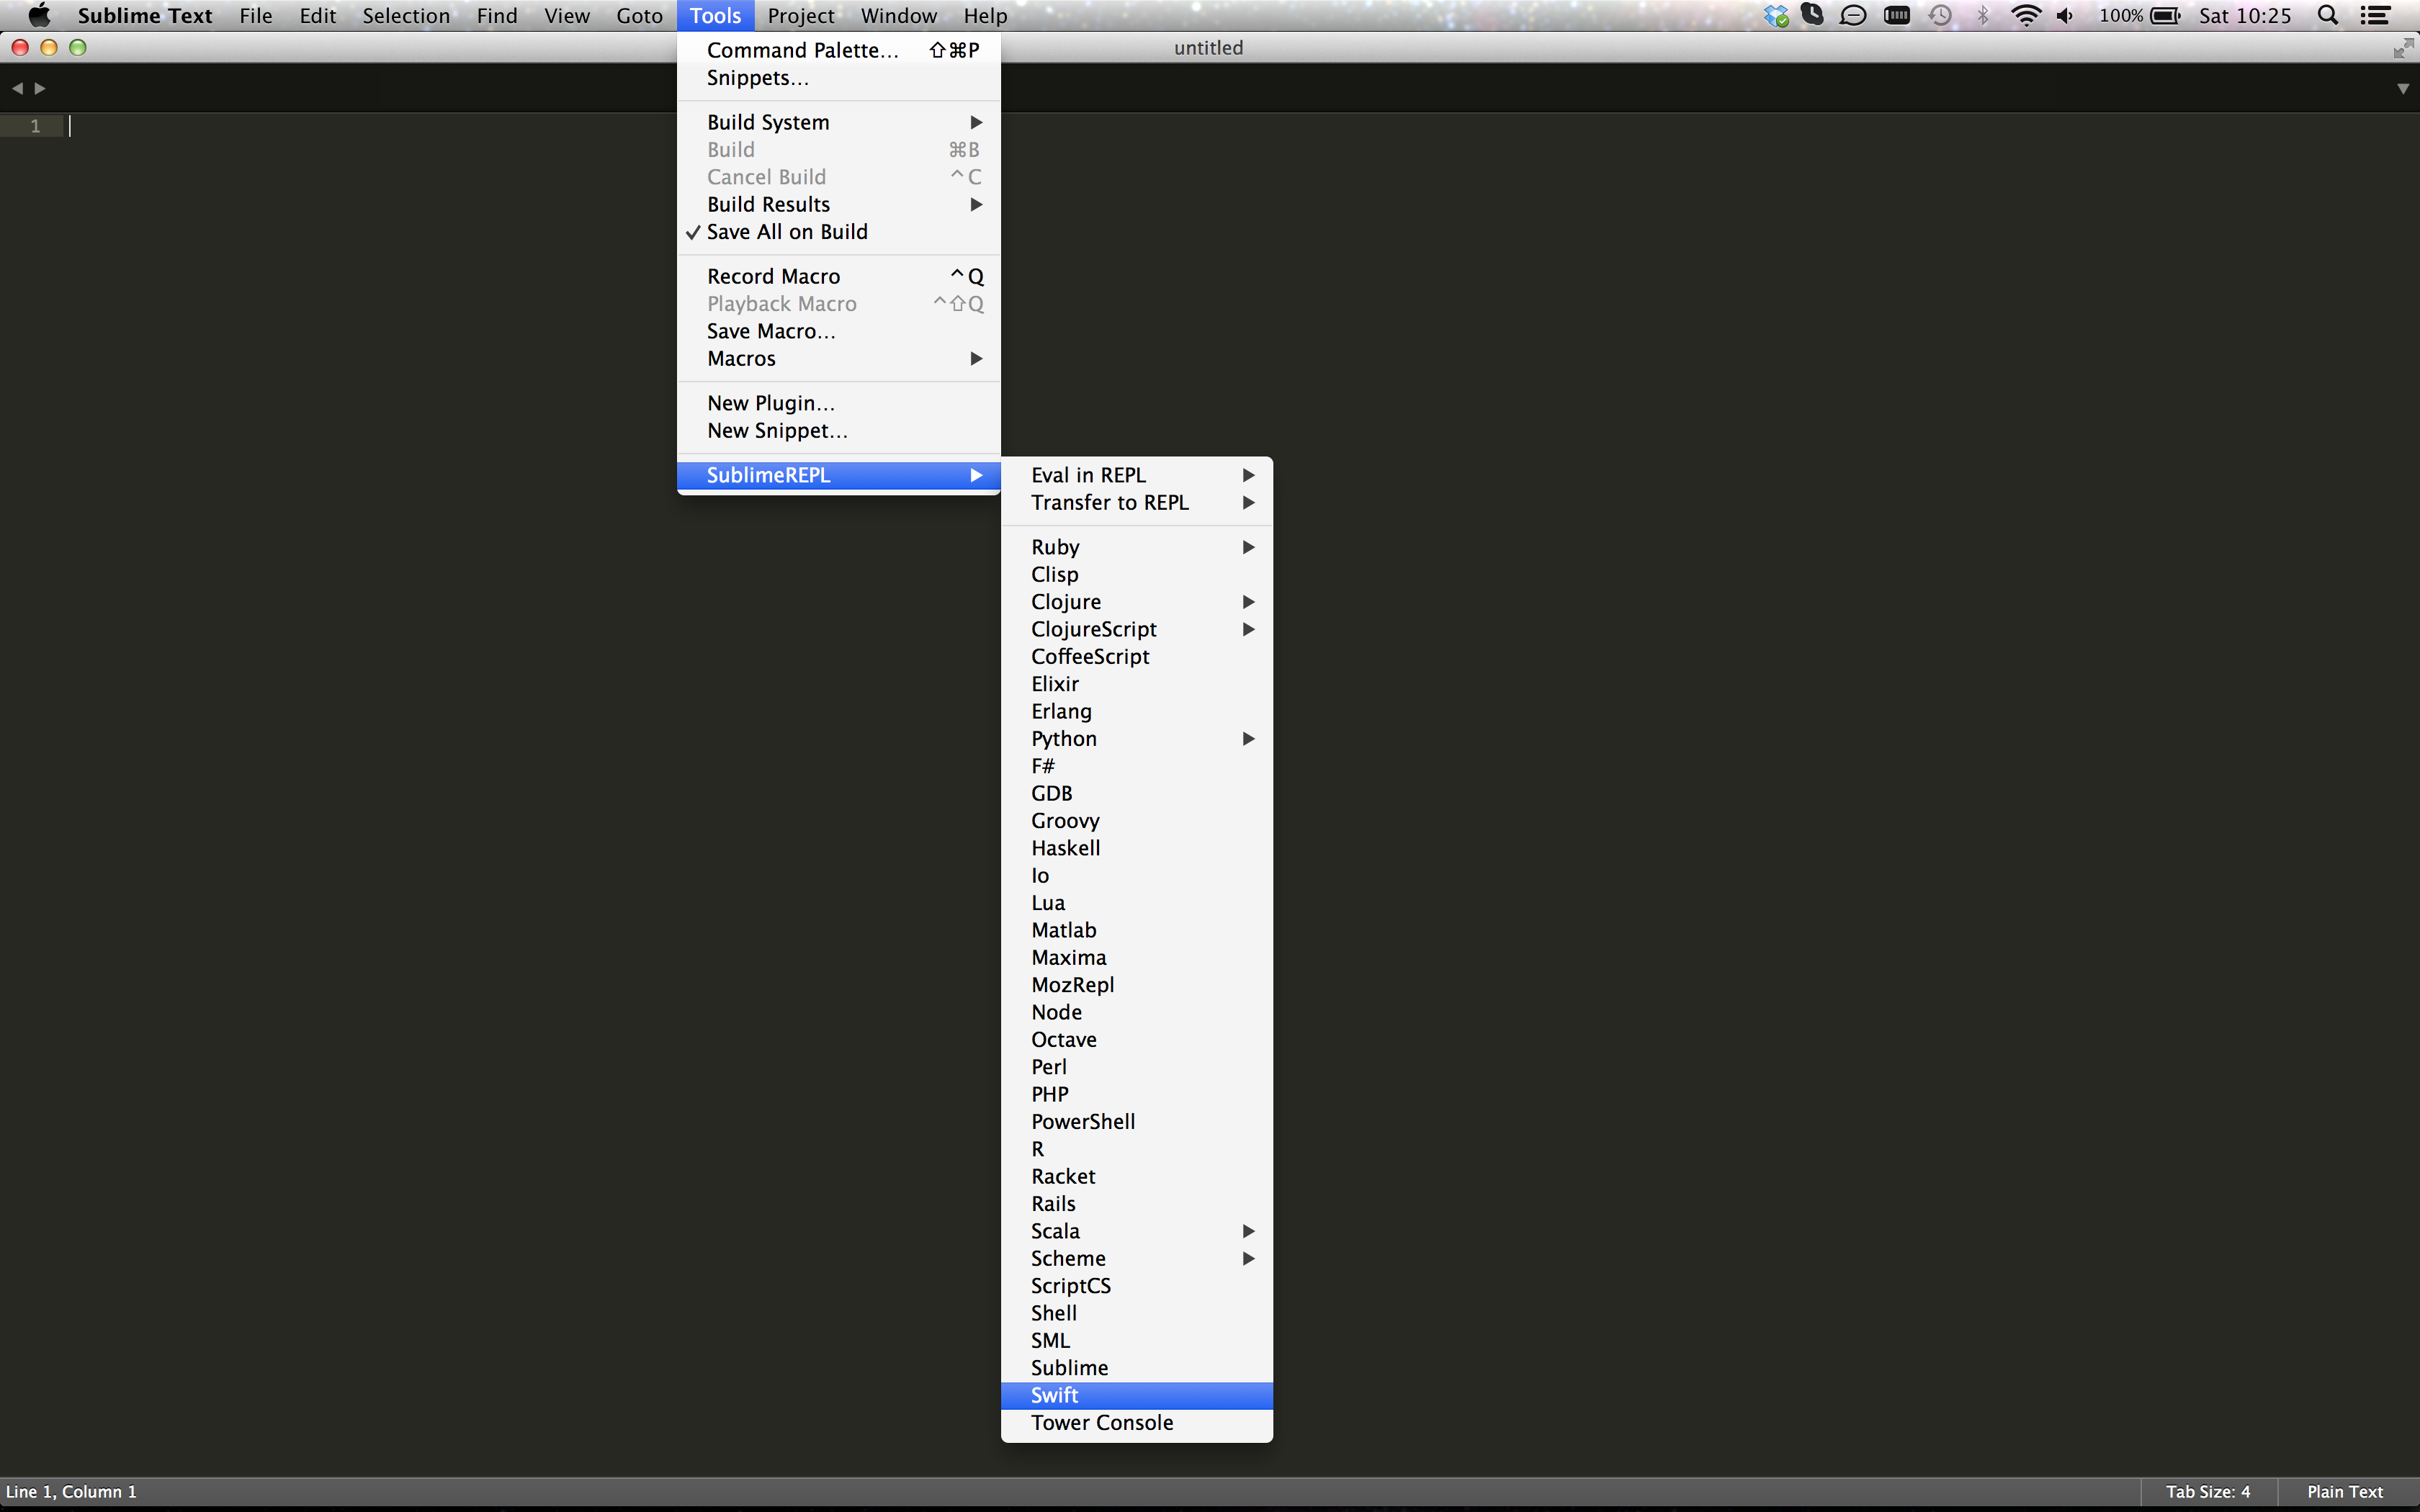
This creates a new menu entry under Tools - SublimeREPL. There you can find a list of different languages the REPLs of which are supported in SublimeREPL. Swift is not there, but let’s add it.
Create a folder called Swift under the following path (or wherever your user-specific Sublime Text files are located):
/Users/{your user}/Library/Application Support/Sublime Text 3/Packages/SublimeREPL/config/
In there, create two files.
First, Default.sublime-commands is responsible for the REPL window and should have the following content:
[
{
"caption": "SublimeREPL: Swift",
"command": "run\_existing\_window_command", "args":
{
"id": "repl_swift",
"file": "config/Swift/Main.sublime-menu"
}
}
]
Second, Main.sublime-menu is going to add a Swift entry under Sublime Text main menu: Tools > Sublime REPL. The contents of the file are as follows:
[
{
"id": "tools",
"children":
[{
"caption": "SublimeREPL",
"mnemonic": "r",
"id": "SublimeREPL",
"children":
[
{"command": "repl_open",
"caption": "Swift",
"id": "repl_swift",
"args": {
"type": "subprocess",
"external_id": "swift",
"encoding": "utf8",
"cmd": {
"osx": ["/Applications/Xcode6-Beta.app/Contents/Developer/Toolchains/XcodeDefault.xctoolchain/usr/bin/swift"]},
"cwd": "$file_path",
"additional_scopes": ["swift"],
"syntax": "Packages/Swift/Swift.tmLanguage"
}
}
]
}]
}
]
Notice two things here - we do rely on the aforementioned Swift syntax highlighter - pointing to a syntax file, Swift.tmLanguage which would be installed together with that plugin. Moreover, under cmd > osx entry, we add a path to our XCode 6 beta installation. I installed in the default place so if you did the same, the file should just work for you, otherwise, you will need to tweak it accordingly.
And that’s it. We should now see a new “Swift” entry in the Sublime REPL menu.
If you click that, you get a new Sublime Text window, with the Swift REPL running there.
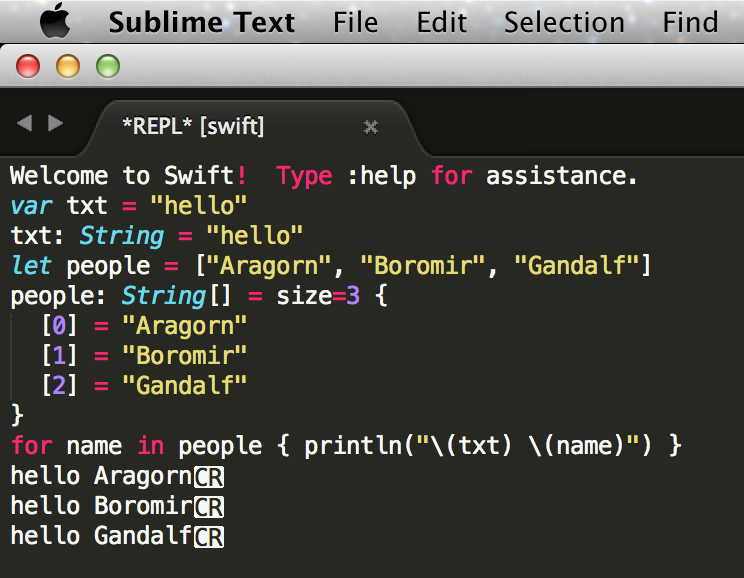
This is particularly convenient if you are coding Swift in ST as you can now dock this REPL window on the side, and have it open all along as a quick playground while you focus on writing your regular code in the main ST window.
I really like the fact that Swift makes it so easy to be XCode independent.