There is no question that the emergence of generative AI is going to significantly alter various aspects of our daily lives. At the same time, most of the large language models (LLMs) are designed as general-purpose black boxes and their utility is initially confined to the data they were trained on. However, it is possible to extend their functionality and reasoning to any custom data set, be it private or public, even without the massive effort that would be needed to retrain or even fine-tune them.
We are going to start exploring that concept today with a multi-part post series on “bringing your own data” to Azure OpenAI. In part one today, we will set up the necessary Azure resources and prepare the stage for a client application integration, which will follow in parts two and further.
Series overview 🔗
- Part 1 (this part): Setting up Azure AI Search for custom data
- Part 2: Calling Azure OpenAI Service with custom data via REST API
- Part 3: Calling Azure OpenAI Service with custom data via .NET SDK
- Part 4: Adding vector search
Understanding Retrieval-Augmented Generation 🔗
The common AI architectural pattern employed in such situations is the so-called Retrieval Augmented Generation (RAG), which was first introduced by P.Lewis et al. in their paper Retrieval-Augmented Generation for Knowledge-Intensive NLP Tasks. RAG is a technique that combines the power of any pre-trained language models with the information retrieval capabilities of our system to enhance the model’s generation of text. When a query is input, the information retrieval component fetches relevant documents or snippets of text from the appropriate data storage, and then feeds that information into the language model as part of the prompt. The model then uses this retrieved information to generate a response that is informed by the content of the retrieved documents.
As a consequence, the prompt that the model receives contains both the original user’s query, as well as the relevant domain or user-specific data, which then allows the LLM to generation a response (or a completion) that is factually correct and grounded in the context provided by the retrieved information.
This is exactly how Bing Chat works, and how it is able to enhance the GPT-4 responses with current data from the Internet.
Architecting the solution in the Azure AI ecosystem 🔗
While it is possible to set up a RAG-based solution using manual orchestration - after all it’s really about the look up of data, which is then fed into the prompt of the Large Language Model - Azure OpenAI Services provides a built-in integration with Azure AI Search (formerly known as Azure Cognitive Search) which enables a streamlined integration of the RAG-pattern into line of business applications and other custom solutions developed and deployed into Azure. This integration enables users to leverage Azure’s robust search capabilities to retrieve relevant information that can then be used by the Azure OpenAI model to generate responses that are not only contextually aware but also enriched by the (possibly vast amounts of) data indexed by Azure AI Search.
A basic end-to-end example illustrating such system can consist of:
- Blob Storage, where our documents will be located and which will act as the data source
- Azure AI Search, where the documents from the data source will be indexed, and which can be queried to find relevant documents
- Azure OpenAI Service, which will act as the gateway to the GPT-4 model, as well as the orchestrator for the RAG pattern
This is what we will proceed to build in this series.
Setting up Azure resources 🔗
To build this sample system effectively, we’ll walk through each step in detail. I will include screenshots from Azure Portal to help with cognitive association - connecting each step to the corresponding Azure service or setting. Although Azure Portal offers this useful interactive interface, it’s important to note that these tasks are fully scriptable and in a typical production environment, scripting is the preferred method for efficiency and scalability.
I already have a pre-existing Azure Storage account, so I will use that - but creating a new one is a standard process that I do not think we need to repeat here. In my Storage account, under Blob Storage, I created a container called documents and imported all the 281 blog articles I have written on this blog since 2012.
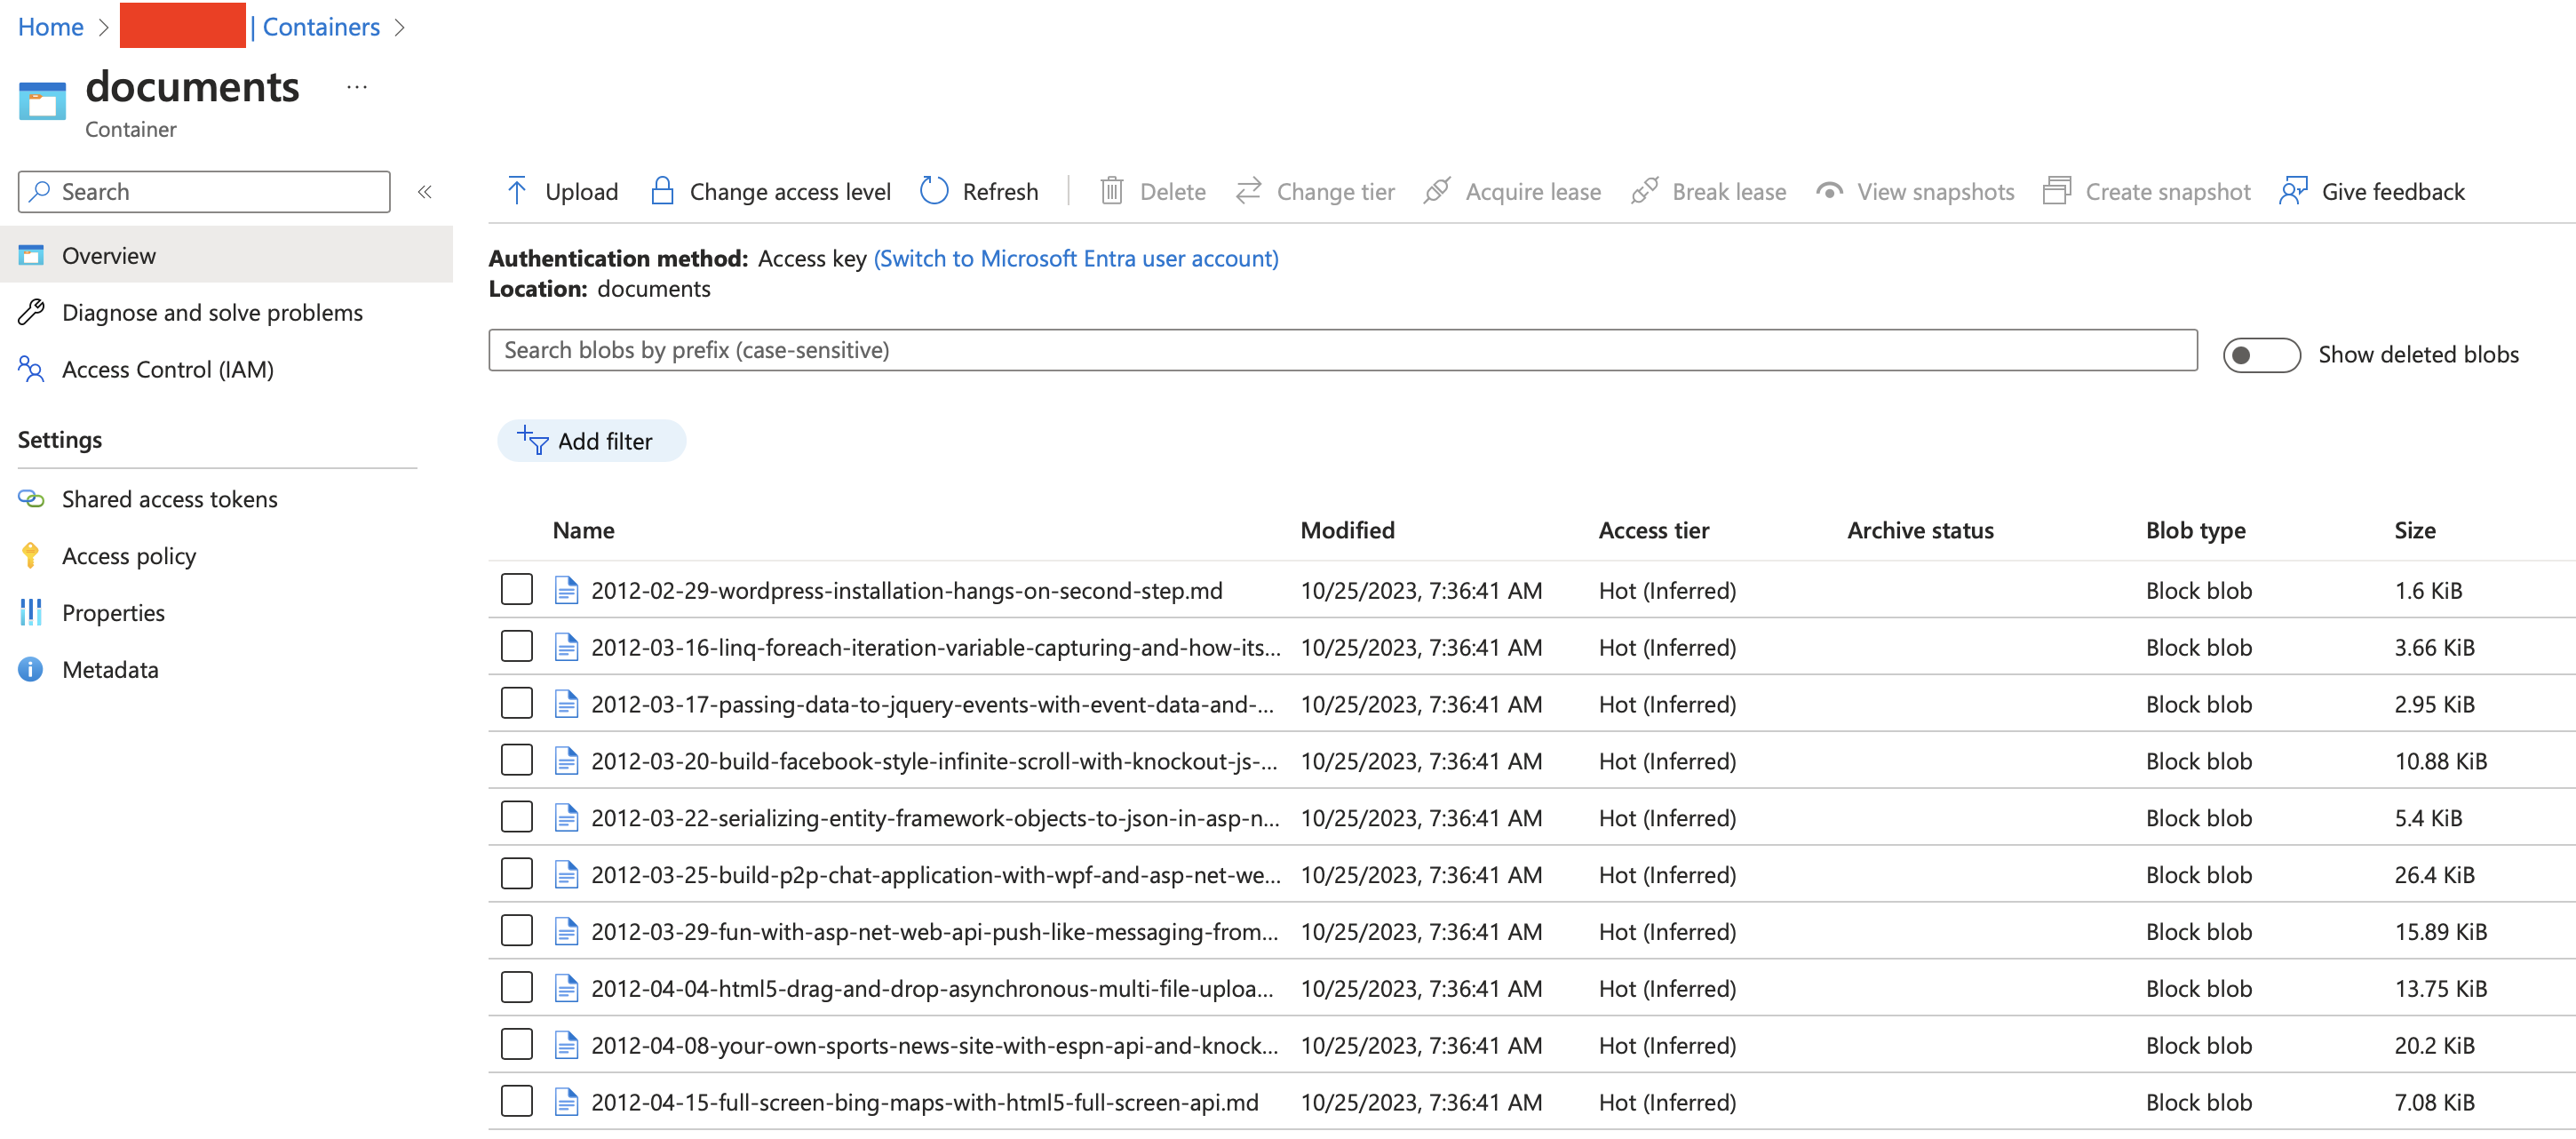
One special thing about this data set, is that each of the blob additionally has a blog_url metadata property, which allows me to associate the Markdown file with the blog article, to the URL at which the post was published in the first place. This will come in handy later on when we implement the search.
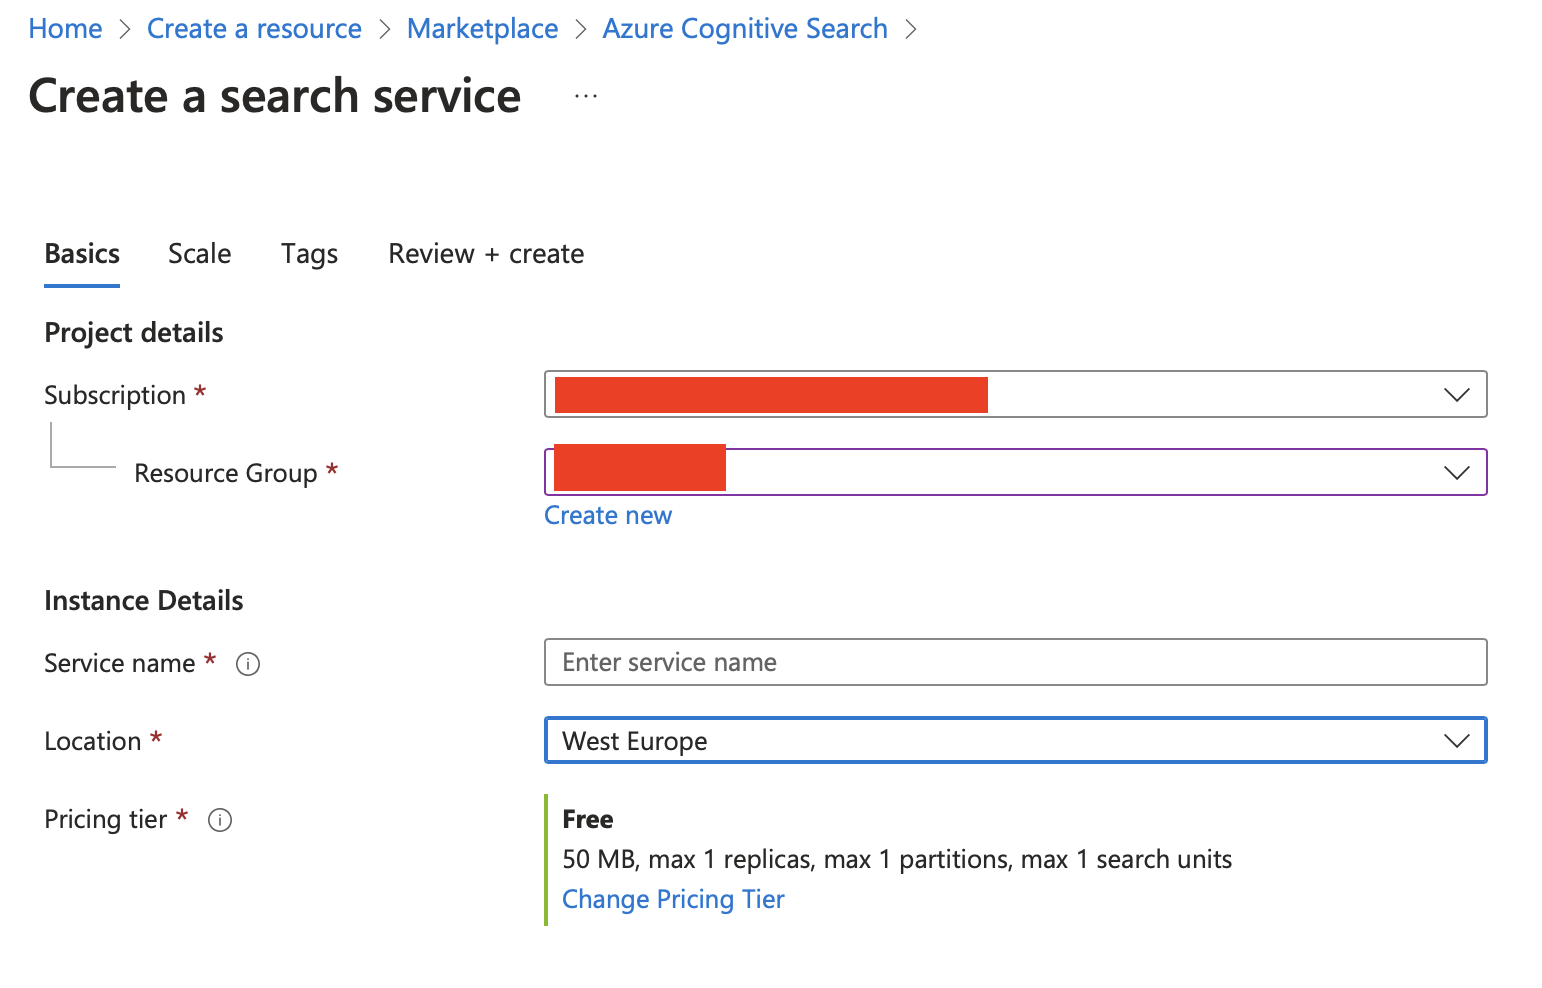
As a next step, we should create an Azure AI Search - the Free tier is enough for our purposes here.
Next, we need to navigate to our search service and connect the Blob Storage as a data source to it. This can be done in the Data sources menu, which has an Add data source dialogue menu. From there, we can select our Blob Storage and the relevant container.
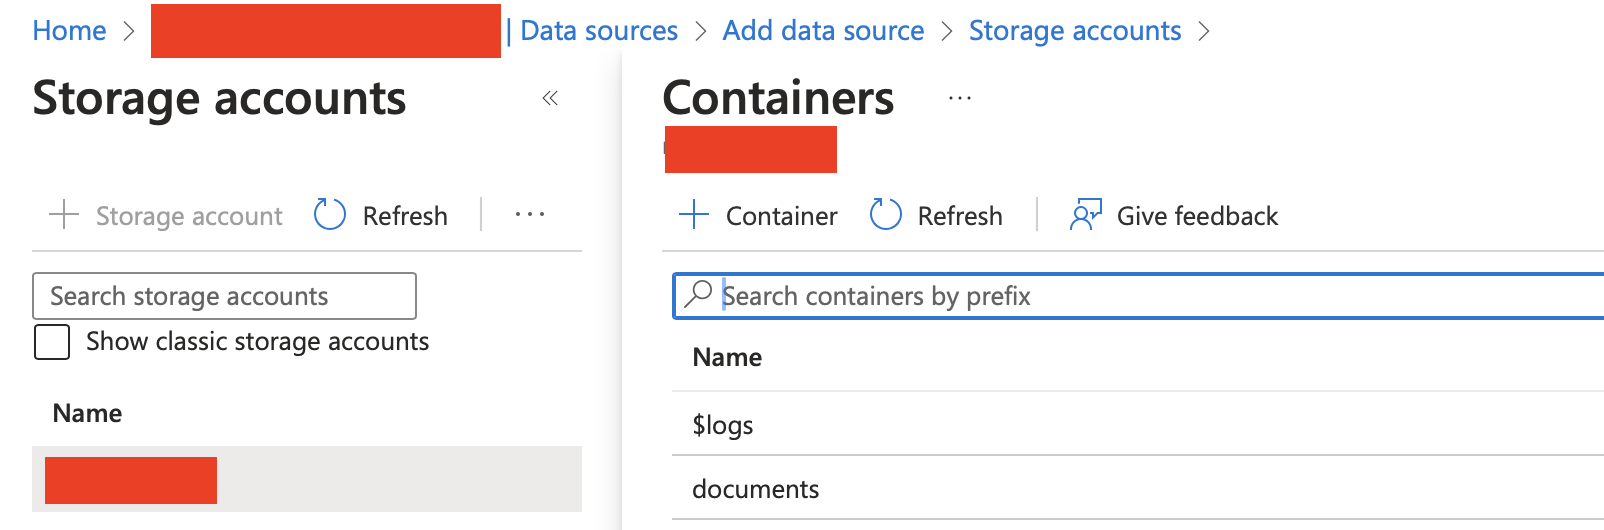
This interface would automatically retrieve the connection string with the key for the Blob Storage, but it’s also possible to switch to system-assigned or user-assigned identities if needed.
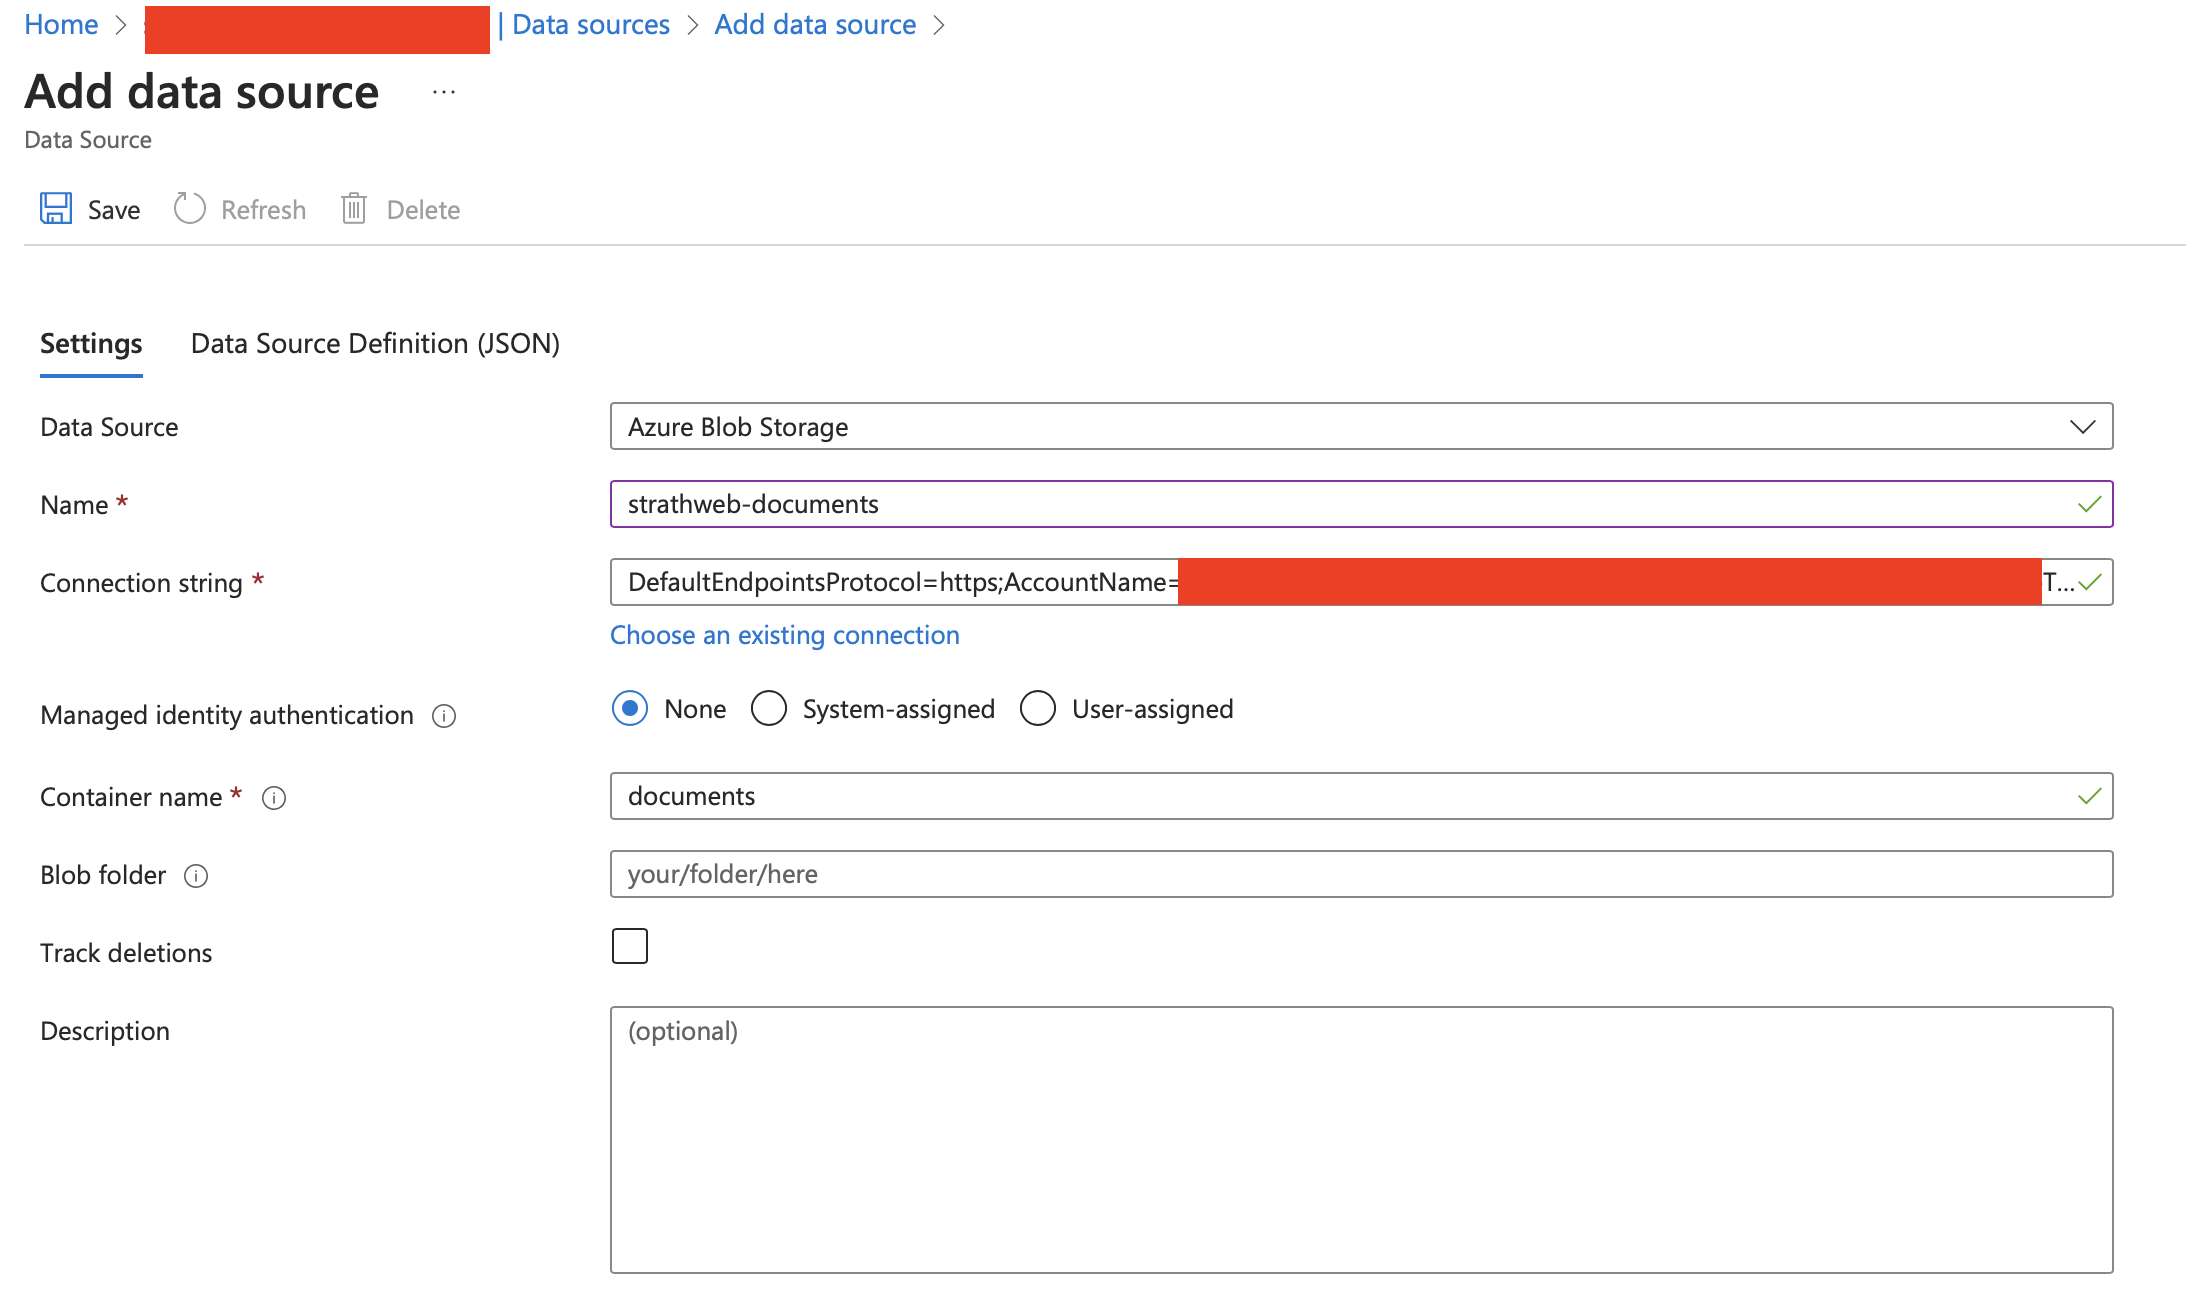
All my documents are currently located in the root folder of the Blob Storage. However, should the need arise, one can limit the data source to a designated path within the Blob Storage, effectively using it as a “virtual folder.” Additionally, it’s feasible to monitor document deletions, enabling the automatic removal of data from our search index when they are deleted from the source. For the purposes of our demo, though, we will work with a fixed set of documents.
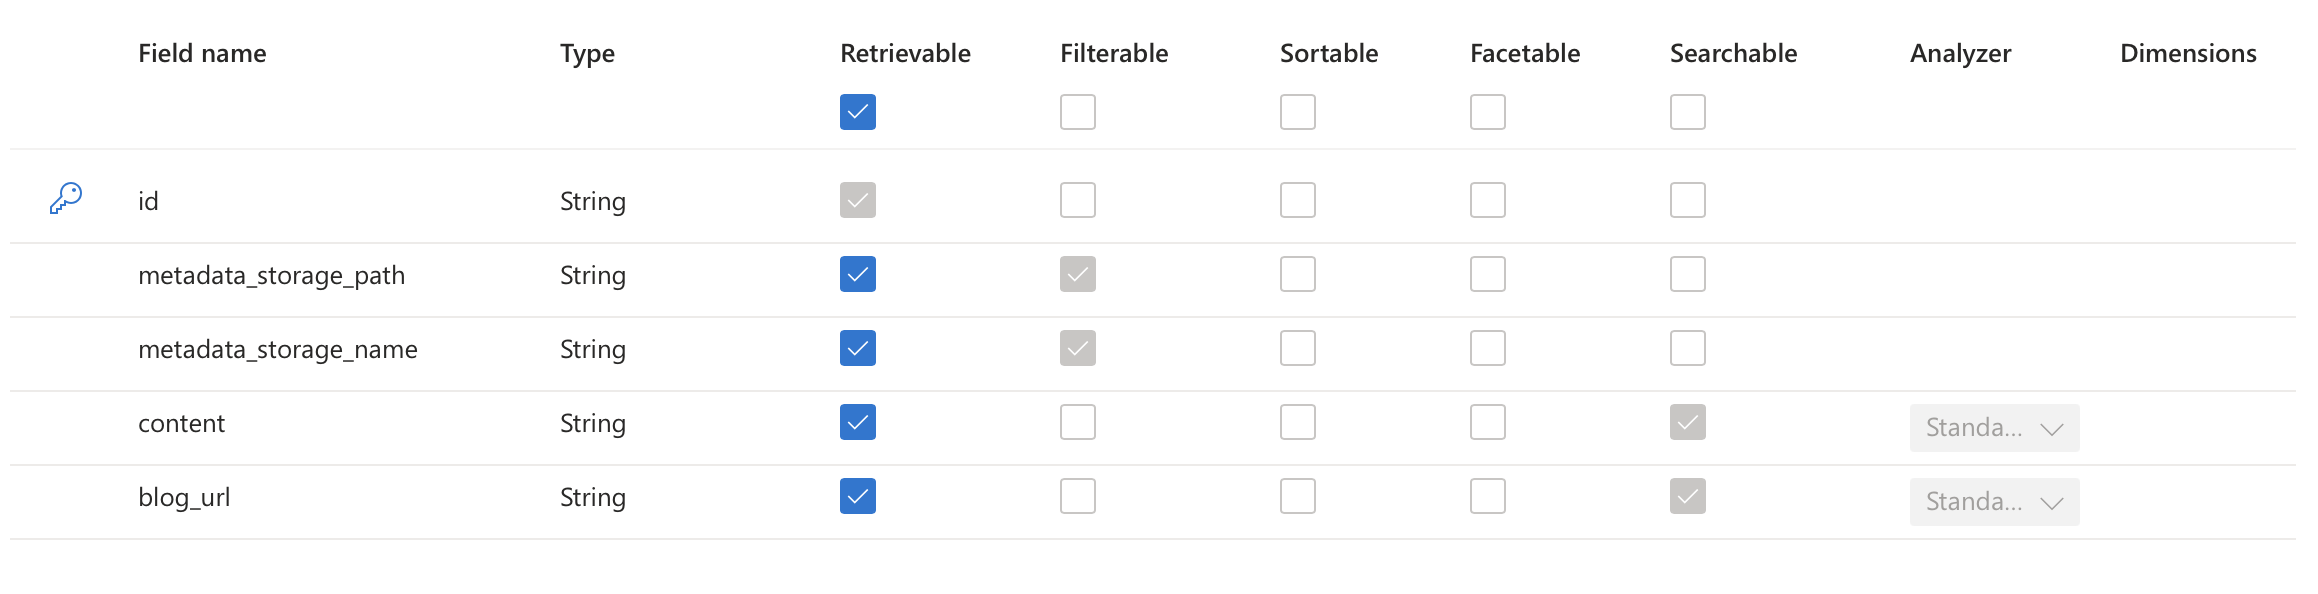
As a next step, we need to set up a search index, which the search will use to query. We can do that by by going to the Indexes menu item, and choosing Add index option in the top dropdown menu. Our index will have four fields:
- metadata_storage_path, which points to the document path in the Blob Storage container
- metadata_storage_name, which is the file name of the document in the Blob Storage container
- content, which will capture the contents of the document
- blog_url, which will capture the blog_url metadata property that we already mentioned earlier.
With the index configured, we can move on to the final piece of Azure Congitive Search setup, and that is the indexer, which will be responsible for querying the configured data source, and updating the index with the discovered data accordingly.
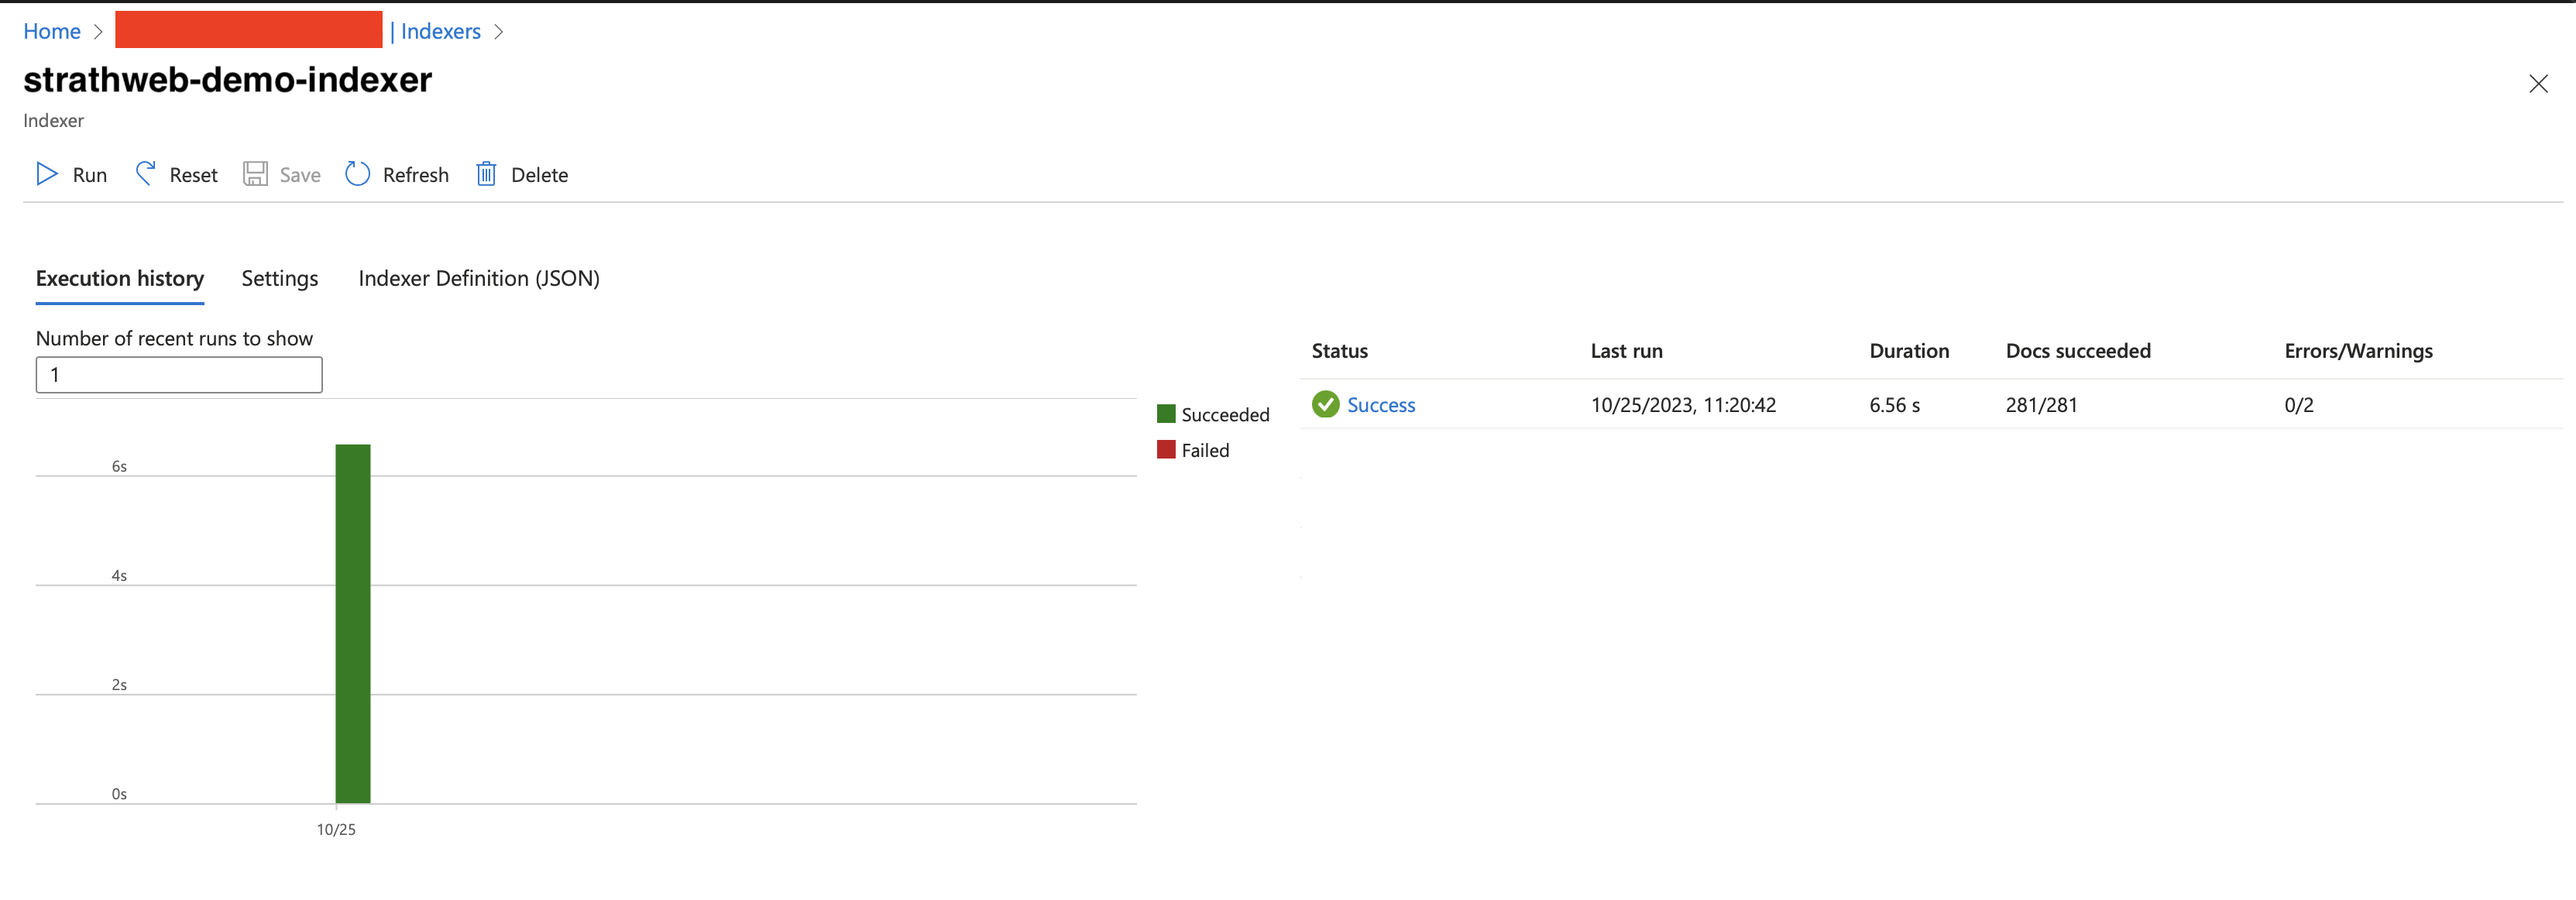
Simiarly to what we did before, we can head off to the Indexers menu item, and choose Add indexer from the top menu. An indexer needs to be connected to the data source and the index that we have already created, as shown on the image below.

The indexer in our setup offers a variety of configurable options, one of which is the execution schedule. This schedule can be set to run as frequently as every 5 minutes. However, for our current needs, which involve a static data set, opting for a manual execution is sufficient. This is represented by the “once” option. Additionally, we will retain the default settings for the other options, as they are fine for our demo.
After the creation, the indexer should run automatically, and index all the documents from our data source. If needed, since we did not configure automatic execution schedule, it can also be triggered by hand using the Run button.
This concludes our Azure Congitive Search set up. To be able to integrate this into a client application we of course also need Azure OpenAI Service, but I assume that if you followed one of the previous posts you already have that setup, along with an appropriate deployed model.
Conclusion 🔗
We have successfully set up Azure AI Search with our own custom data. In the next post in this series we will look at building a client application combining the Azure AI Search with a GPT-4 model hosted in Azure OpenAIm, into a powerful conversational tool capable of discussing the custom data set.
Now, since the custom data set in this example is the content of this blog, we will build a de-facto Strathweb Copilot.