Last year, Microsoft announced the Copilot Plus PC, a new class of devices that are designed to run AI workloads locally. The flagship device of the line is of course the Surface Pro 11, which is powered by the Qualcomm Snapdragon X Elite ARM processor. Unfortunately, since the launch, the AI capabilities have been more than underwhelming, as few applications and workloads are able to take advantage of the integrated NPU hardware.
One of the milestones in this direction is the Phi Silica model, which is a small but powerful ONNX-Runtime-based on-device SLM (Small Language Model) that is designed to run on the Copilot Plus PC NPU, and that is built into the Windows Copilot Runtime. This removes a lot of the friction that developers have when trying to run models on-device, as they can now simply use the Windows App SDK to access the NPU and invoke the model just like ant other system API.
Today we will have a look at how to use the Phi Silica model in a Windows App SDK applications.
Pre-requisites 🔗
There are quite a few here, and there is no getting around them.
- The first and most obvious thing is that we need a Copilot Plus PC - no emulation will work here. Phi Silica is part of Windows Copilot Runtime, which is only available when running on the Copilot Plus PC.
- Then, we need to be on the Windows 11 Insider build, as the Phi Silica model is not available in the stable release yet. Phi Silica was included in Windows 11 Insider Preview Build 26120.3073 (KB5050090), so make sure you are on that build or later. Ideally, given how volatile things are, the latest build from the dev channel is the best option.
- We need to extend Visual Studio 2022 installation with the capability to build Windows App SDK applications. The workload to install is called WinUI application development.
- We also need to install the latest WinAppSDK from the experimental channel. As I am writing this, the latest version is 1.8.250410001-experimental1. The SDK is also referenced from the app via the NuGet package.
Getting started 🔗
Let’s start by creating a simple Windows App SDK application. We can use the Blank App, Packaged (WinUI 3 in Desktop) template in Visual Studio to do this. The template will create a simple WinUI 3 application that you can run on your PC.
Now, with the empty app there, let’s make sure the correct WinAppSDK version is referenced. We can do that by going to the csproj file and making sure the following lines are present:
<PackageReference Include="Microsoft.WindowsAppSDK" Version="1.8.250410001-experimental1" />
We should now be in the position to take advantage of the new AI APIs that are added in the experimental SDK - including, of course, the Phi Silica model.
Building the application around Phi Silica 🔗
Some time ago, I blogged about using Azure AI Inference as a way to easily toggle between the AI models running either in the cloud, or locally, behind a local HTTP server. In that post we used a toy problem of classifying a medical conditions based on a general description of the symptoms. For the sake of continuity, let’s use the same example here. I recommend you check out that post for more background on the problem.
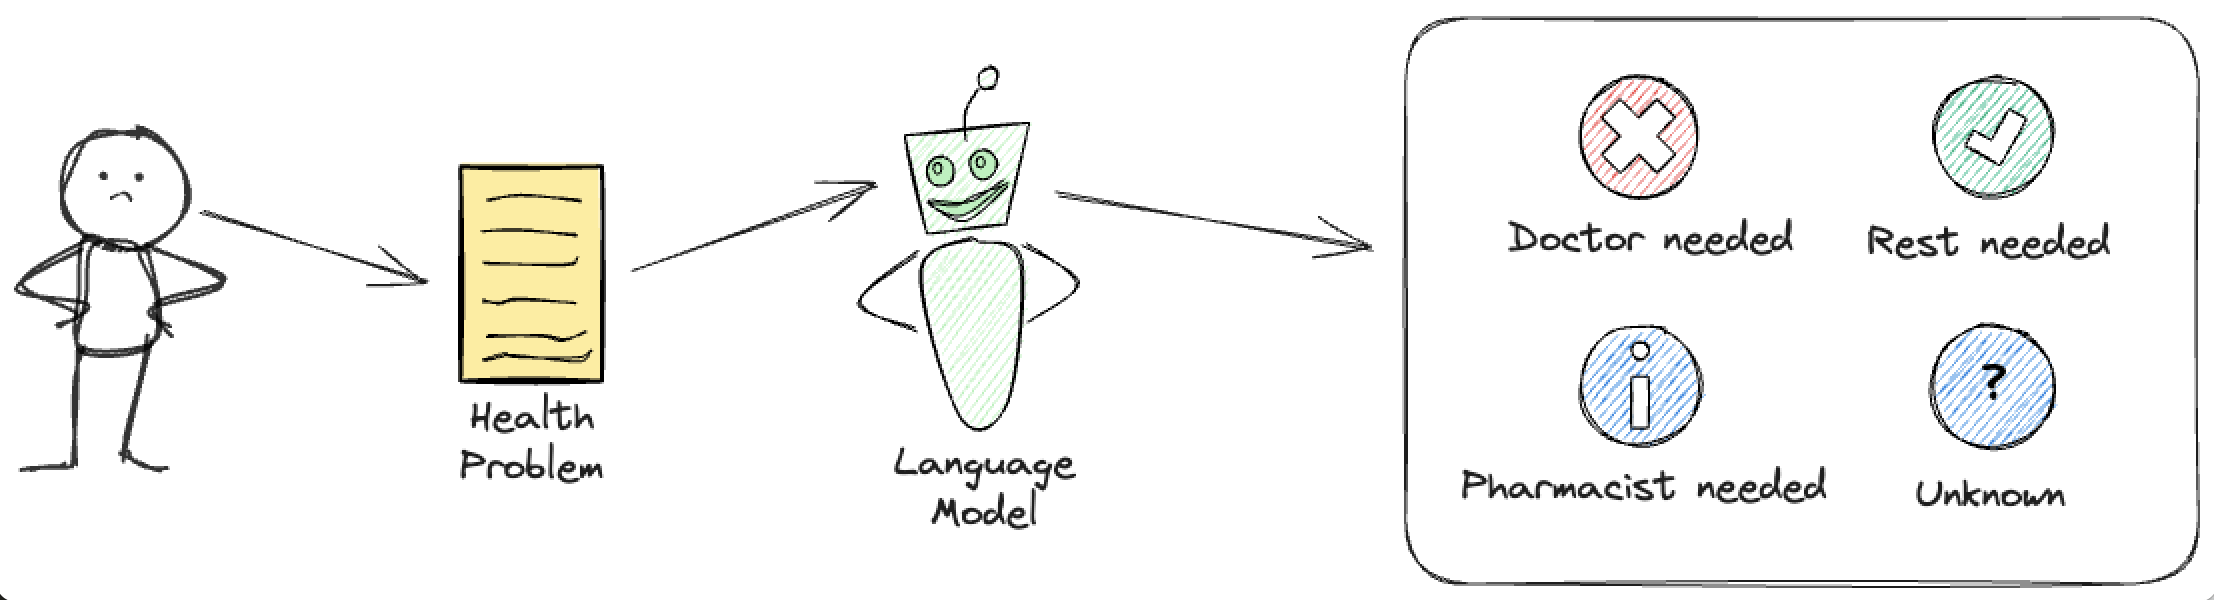
‼️ Remember that this is just a “fun” example, and the model is not a replacement for a real medical advice. The classification is based on the prompt, and the model is not trained to provide any medical advice!
We will start by initializing the language model at the startup of the application. Phi Silica is available as a LanguageModel type, from the Microsoft.Windows.AI.Generative namespace.
We should call GetReadyState() to check if the model is ready. If it is not, we should call EnsureReadyAsync() to make sure the model is downloaded and installed on the user’s device. This is typically needed only once, and the model will be cached on the device for future use.
After that we can call CreateAsync() to create the model and store it in the static property of the app, so that we can access it later.
public partial class App : Application
{
    public static LanguageModel? LanguageModel { get; private set; }

    public App()
    {
        this.InitializeComponent();
        InitializeAIModelAsync();
    }

    private async void InitializeAIModelAsync()
    {
        try
        {
            if (LanguageModel.GetReadyState() != AIFeatureReadyState.Ready)
            {
                var op = await LanguageModel.EnsureReadyAsync();
            }
            LanguageModel = await LanguageModel.CreateAsync();
        }
        catch (Exception ex)
        {
            Debug.WriteLine($"Error initializing AI model: {ex}");
        }
    }

    protected override void OnLaunched(Microsoft.UI.Xaml.LaunchActivatedEventArgs args)
    {
        m_window = new MainWindow();
        m_window.Activate();
    }

    private Window? m_window;
}
Let’s then port the problem described above to this Phi Silica model. We can take over the instructions from the old post pretty much as they are, and we can use the newly created LanguageModel to run the inference. Let’s create a new class called MedicalClassificationService that will be responsible for running the classification.
public class MedicalClassificationService
{
    private readonly string _classificationPrompt = @"You are a medical classification engine for health conditions. Classify the prompt into into one of the following possible treatment options: doctor_required (serious condition), pharmacist_required (light condition) or rest_required (general tiredness). If you cannot classify the prompt, output unknown.
Only respond with the single word classification. Do not produce any additional output. Do not use quotation marks in the response.

# Examples:
User: I did not sleep well. Assistant: rest_required
User: I might have broken an arm. Assistant: doctor_required

# Task
User: ";

   public async Task<string> ClassifyMedicalConditionAsync(string condition)
   {
       try
       {
           if (App.LanguageModel == null)
           {
               return "AI model not initialized";
           }

           var prompt = $"{_classificationPrompt}{condition} Assistant: ";
           var result = await App.LanguageModel.GenerateResponseAsync(prompt);

           switch (result.Status)
           {
               case LanguageModelResponseStatus.Complete:
                   return result.Text.Trim();
               case LanguageModelResponseStatus.ResponseBlockedByContentModeration:
                   return "Error: Response blocked by content moderation";
               case LanguageModelResponseStatus.PromptBlockedByContentModeration:
                   return "Error: Prompt Blocked by content moderation";
               case LanguageModelResponseStatus.BlockedByPolicy:
                   return "Error: Blocked by runtime";
               case LanguageModelResponseStatus.PromptLargerThanContext:
                   return "Error: Prompt larger than context";
               default:
                   return "Error: Unknown status";
           }
       }
       catch (Exception ex)
       {
           return $"Unknown Error: {ex}";
       }
   }
}
Executing inference against Phi Silica is as simple as calling the GenerateResponseAsync method on the model. The model will take care of the rest, including tokenization and batching. What we get back is a LanguageModelResponseResult object, which contains the status of the operation and the generated text.
The status allows us to check if the operation was successful, and if not, we can take appropriate action. The typical reasons for failure are content moderation, which is built-into Phi Silica API, or the prompt being larger than the context.
Finally, we need a simple UI to test this service. The XAML is shown below:
<?xml version="1.0" encoding="utf-8"?>
<Window
    x:Class="App2.MainWindow"
    xmlns="http://schemas.microsoft.com/winfx/2006/xaml/presentation"
    xmlns:x="http://schemas.microsoft.com/winfx/2006/xaml"
    xmlns:local="using:App2"
    xmlns:d="http://schemas.microsoft.com/expression/blend/2008"
    xmlns:mc="http://schemas.openxmlformats.org/markup-compatibility/2006"
    mc:Ignorable="d"
    Title="Medical Condition Classifier">

    <Grid Padding="20">
        <Grid.RowDefinitions>
            <RowDefinition Height="Auto"/>
            <RowDefinition Height="Auto"/>
            <RowDefinition Height="Auto"/>
            <RowDefinition Height="Auto"/>
            <RowDefinition Height="*"/>
        </Grid.RowDefinitions>

        <TextBlock Grid.Row="0"
                   Text="Medical Condition Classifier"
                   FontSize="24"
                   FontWeight="Bold"
                   Margin="0,0,0,20"/>

        <TextBlock Grid.Row="1"
                   Text="Enter your medical condition or symptoms:"
                   Margin="0,0,0,10"/>

        <TextBox Grid.Row="2"
                 x:Name="ConditionTextBox"
                 PlaceholderText="e.g. I have a headache and fever"
                 Margin="0,0,0,20"
                 Height="100"
                 TextWrapping="Wrap"
                 AcceptsReturn="True"/>

        <Button Grid.Row="3"
                x:Name="ClassifyButton"
                Content="Classify Condition"
                HorizontalAlignment="Left"
                Click="ClassifyButton_Click"
                Margin="0,0,0,20"/>

        <Grid Grid.Row="4">
            <Grid.RowDefinitions>
                <RowDefinition Height="Auto"/>
                <RowDefinition Height="*"/>
            </Grid.RowDefinitions>

            <TextBlock Grid.Row="0"
                       Text="Classification Result:"
                       Margin="0,0,0,10"
                       FontWeight="SemiBold"/>

            <Border Grid.Row="1"
                    BorderBrush="{ThemeResource SystemControlForegroundBaseMediumBrush}"
                    BorderThickness="1"
                    Padding="10">
                <TextBlock x:Name="ResultTextBlock"
                           Text="No condition has been classified yet."
                           TextWrapping="Wrap"/>
            </Border>

            <ProgressRing Grid.Row="1"
                          x:Name="LoadingIndicator"
                          IsActive="False"
                          Width="50"
                          Height="50"/>
        </Grid>
    </Grid>
</Window>
And the code behind, which will invoke our MedicalClassificationService when clicking the button, and display the result:
using System;
using System.Collections.Generic;
using System.IO;
using System.Linq;
using System.Runtime.InteropServices.WindowsRuntime;
using Microsoft.UI.Xaml;
using Microsoft.UI.Xaml.Controls;
using Microsoft.UI.Xaml.Controls.Primitives;
using Microsoft.UI.Xaml.Data;
using Microsoft.UI.Xaml.Input;
using Microsoft.UI.Xaml.Media;
using Microsoft.UI.Xaml.Navigation;
using Windows.Foundation;
using Windows.Foundation.Collections;
using App2.Services;
using Windows.UI;
using Microsoft.UI;

namespace App2
{
    public sealed partial class MainWindow : Window
    {
        private readonly MedicalClassificationService _classificationService;

        public MainWindow()
        {
            this.InitializeComponent();
            _classificationService = new MedicalClassificationService();
        }

        private async void ClassifyButton_Click(object sender, RoutedEventArgs e)
        {
            string condition = ConditionTextBox.Text.Trim();

            if (string.IsNullOrEmpty(condition))
            {
                ResultTextBlock.Text = "Please enter a medical condition to classify.";
                return;
            }

            try
            {
                LoadingIndicator.IsActive = true;
                ClassifyButton.IsEnabled = false;
                ResultTextBlock.Text = "Classifying...";

                string classification = await _classificationService.ClassifyMedicalConditionAsync(condition);

                ResultTextBlock.Text = classification;

                switch (classification.ToLower())
                {
                    case "doctor_required":
                        ResultTextBlock.Text = "Doctor Required - This appears to be a serious condition that requires medical attention.";
                        ResultTextBlock.Foreground = new SolidColorBrush(Colors.Red);
                        break;
                    case "pharmacist_required":
                        ResultTextBlock.Text = "Pharmacist Required - This appears to be a mild condition that may be treated with over-the-counter medication.";
                        ResultTextBlock.Foreground = new SolidColorBrush(Colors.Orange);
                        break;
                    case "rest_required":
                        ResultTextBlock.Text = "Rest Required - This appears to be general tiredness or minor discomfort that may improve with rest.";
                        ResultTextBlock.Foreground = new SolidColorBrush(Colors.Green);
                        break;
                    case "unknown":
                        ResultTextBlock.Text = "Unknown - Unable to classify the condition based on the provided information.";
                        ResultTextBlock.Foreground = new SolidColorBrush(Colors.Gray);
                        break;
                    default:
                        ResultTextBlock.Text = $"{ResultTextBlock.Text}";
                        ResultTextBlock.Foreground = new SolidColorBrush(Colors.White);
                        break;
                }
            }
            catch (Exception ex)
            {
                ResultTextBlock.Text = $"Error: {ex}";
            }
            finally
            {
                LoadingIndicator.IsActive = false;
                ClassifyButton.IsEnabled = true;
            }
        }
    }
}
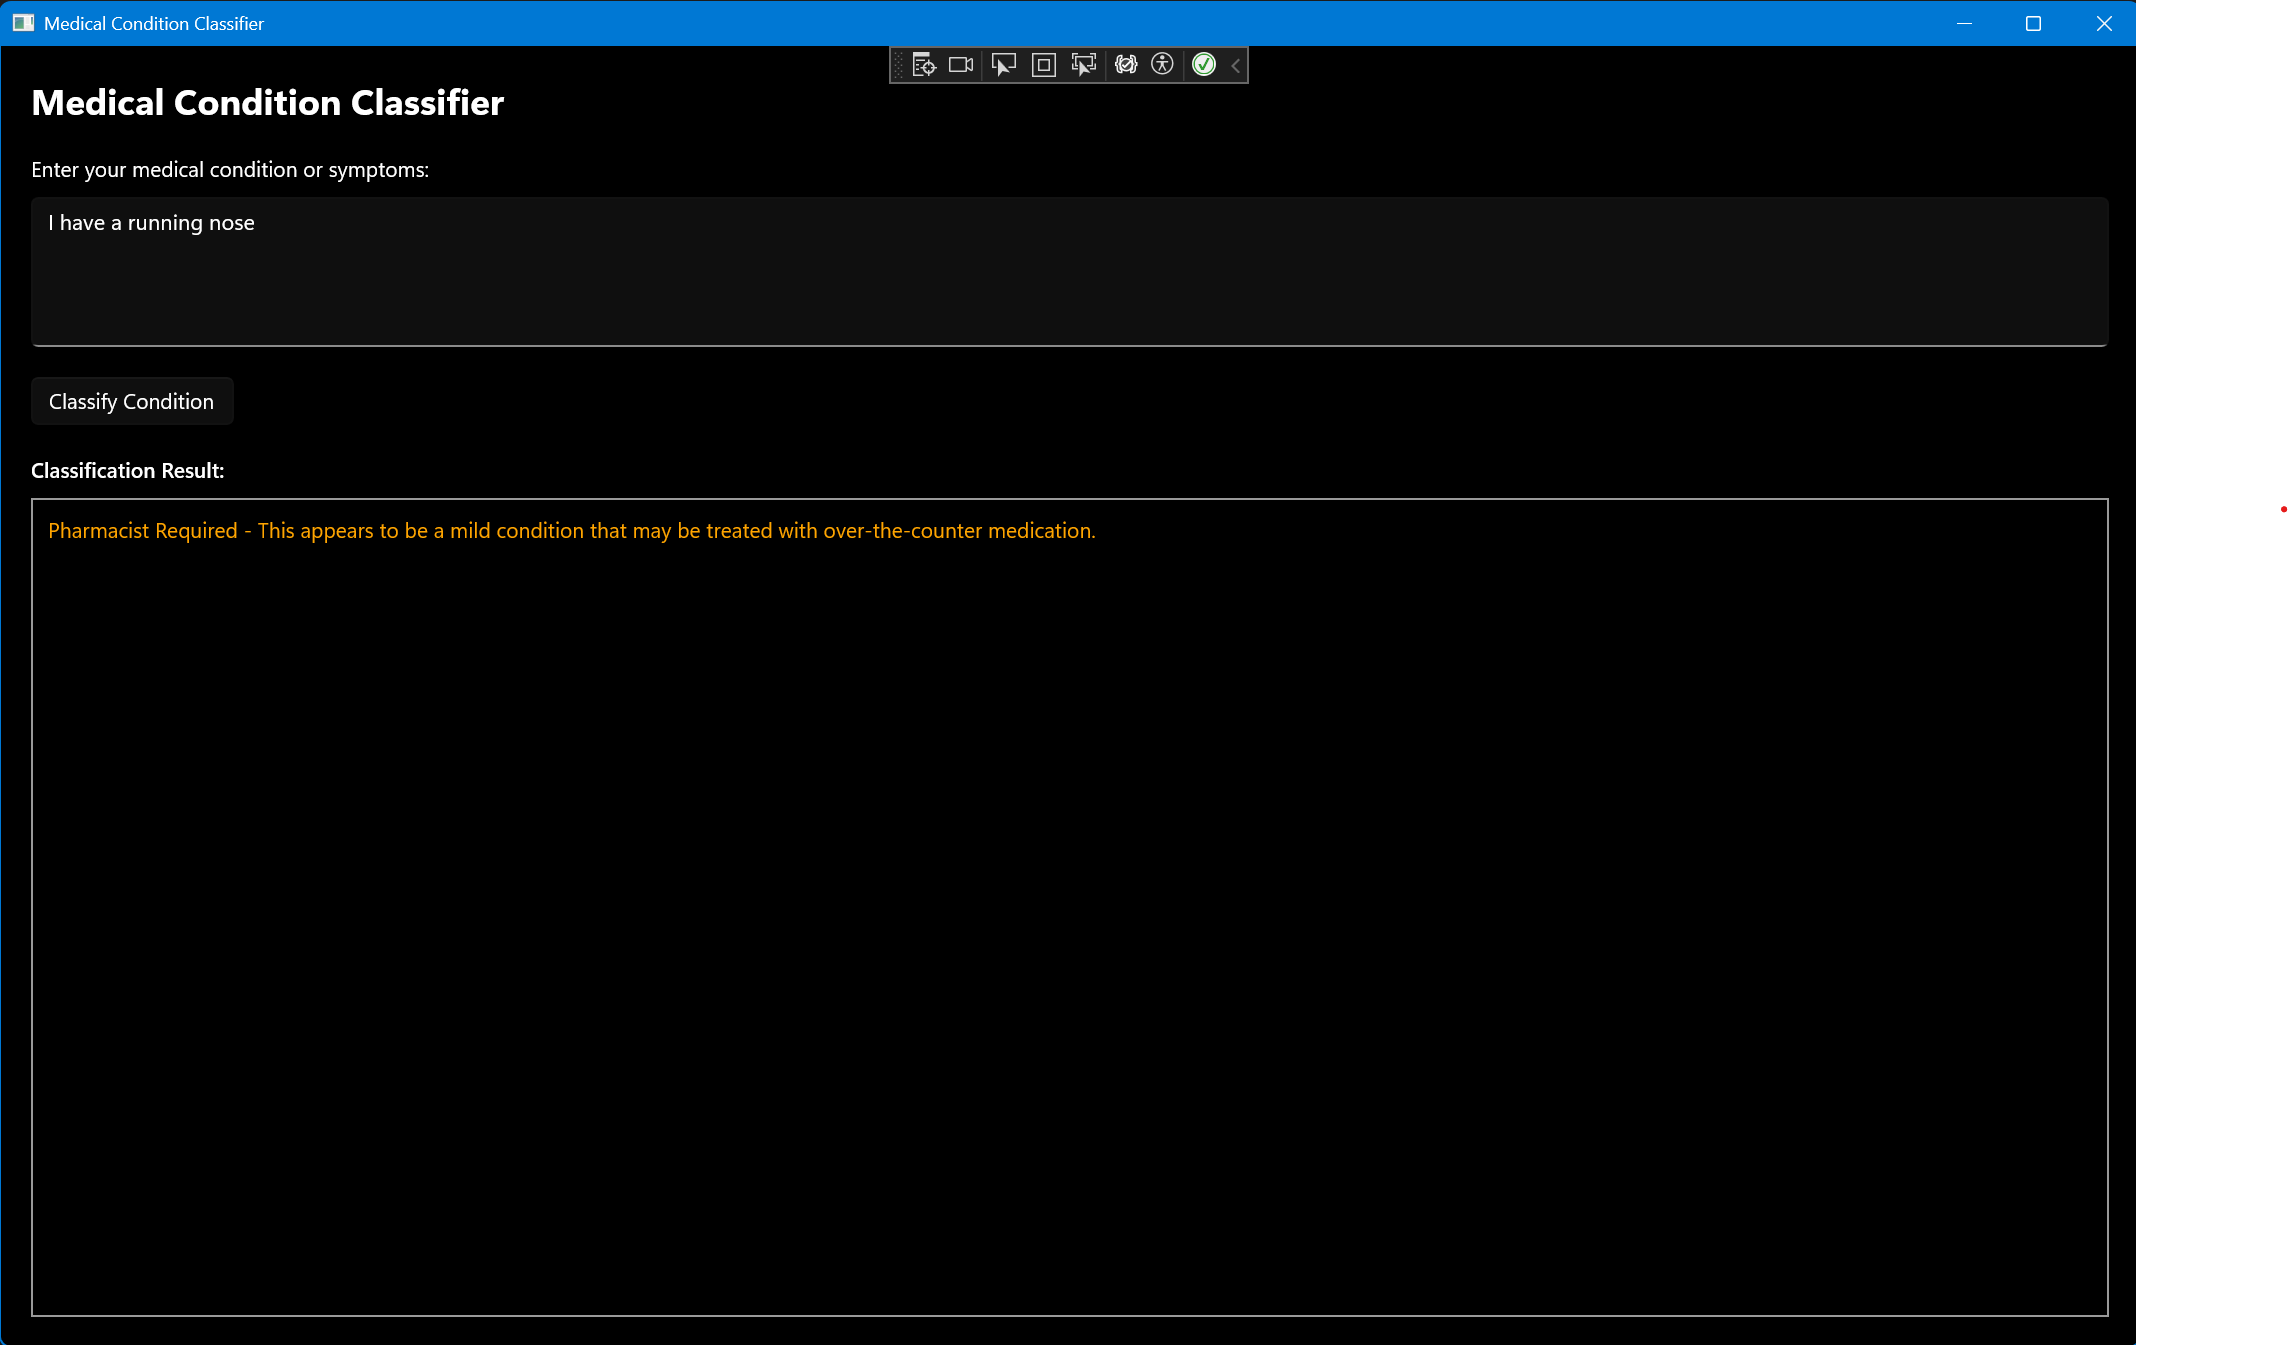
With this in place, we are in position to test the application. We need to make sure that the configuration is set to ARM64 as otherwise the AI APIs will not work. The started applications should look like om the screenshot below. We can try inputting some condition, such as I have a running nose, and click the Classify Condition button. The application will then call the Phi Silica model and classify the condition, and output the result in the text box below.
So far we use the basic functionality of the model - we simply called the GenerateResponseAsync method and passed the prompt to it. However, we can also gain more control over the model by passing LanguageModelOptions to it. This allows us to set the temperature, top-p, top-k and content filter options. The default content filter severity can also be adjusted - by default it is set to Medium, but we can set it to Low, to make the model even stricter. Setting to High is currently not supported, and will always result in LanguageModelResponseStatus.BlockedByPolicy status.
An example of a more fine tuned approach to inference is shown below:
var contentFilterOptions = new ContentFilterOptions();
contentFilterOptions.PromptMaxAllowedSeverityLevel.SelfHarm = SeverityLevel.Low;
contentFilterOptions.PromptMaxAllowedSeverityLevel.Violent = SeverityLevel.Low;

var languageModelOptions = new LanguageModelOptions();
languageModelOptions.Temperature = 0.0f;
languageModelOptions.TopP = 0.1f;
languageModelOptions.TopK = 1;
languageModelOptions.ContentFilterOptions = contentFilterOptions;

var result = await App.LanguageModel.GenerateResponseAsync(prompt, languageModelOptions);
Conclusion 🔗
Working with Phi Silica via Windows App SDK is a very pleasant, plug and play experience. The model is very responsive and the results are decent for model of that size. It is fast on the NPU and the API is not too complicated.
If you would like to learn more, check out the official documentation for Windows App SDK AI. The source for this blog post - the entire application - is available, as always, on GitHub.