For our Retrieval-Augmented-Generation (RAG) application, we setup AI Search in part 1, however so far we only used it using the basic keyword search.
In this part 4 of the series about bringing your own data to Azure OpenAI Service, we will go ahead and integrate vector search, as a more sophisticated way of performing the search across the Azure AI Search index within our RAG-pattern system.
I already covered vectorization and embeddings using the OpenAI embedding model on this blog, and we will be relying on the same principles here. I recommend reading through that article before continuing if you are not yet familiar with the concept of embeddings.
Series overview 🔗
- Part 1: Setting up Azure AI Search for custom data
- Part 2: Calling Azure OpenAI Service with custom data via REST API
- Part 3: Calling Azure OpenAI Service with custom data via .NET SDK
- Part 4 (this part): Adding vector search
Vector search 🔗
Vector-based search leverages the subtleties of concepts embedded within the indexed content, enabling us to query the underlying ideas and relationships - something that is way beyond the capabilities of traditional keyword search. This leads to retrieval of information that is conceptually related, even if the exact keywords are not present, leading to richer and more intuitive search experiences.
As a result, a search for “dark energy” might return results for “cosmological constant” or “expanding universe”, even though there is no keyword match between these terms. In a similar fashion, the vector search is language-agnostic, so a query for “Verschränkung” (German for “entanglement”) would return English results about quantum entanglement.
Updating the index to use vectors 🔗
We will be referring a lot to the material we went through in part 1, as that part dealt with setting up the search and the index. In principle it is possible to add vector fields to an existing index, however to add the skillsets we will be adding today, the key field must have a keyword analyzer on it, and this is not how we set things up originally, so we will create a new index today.
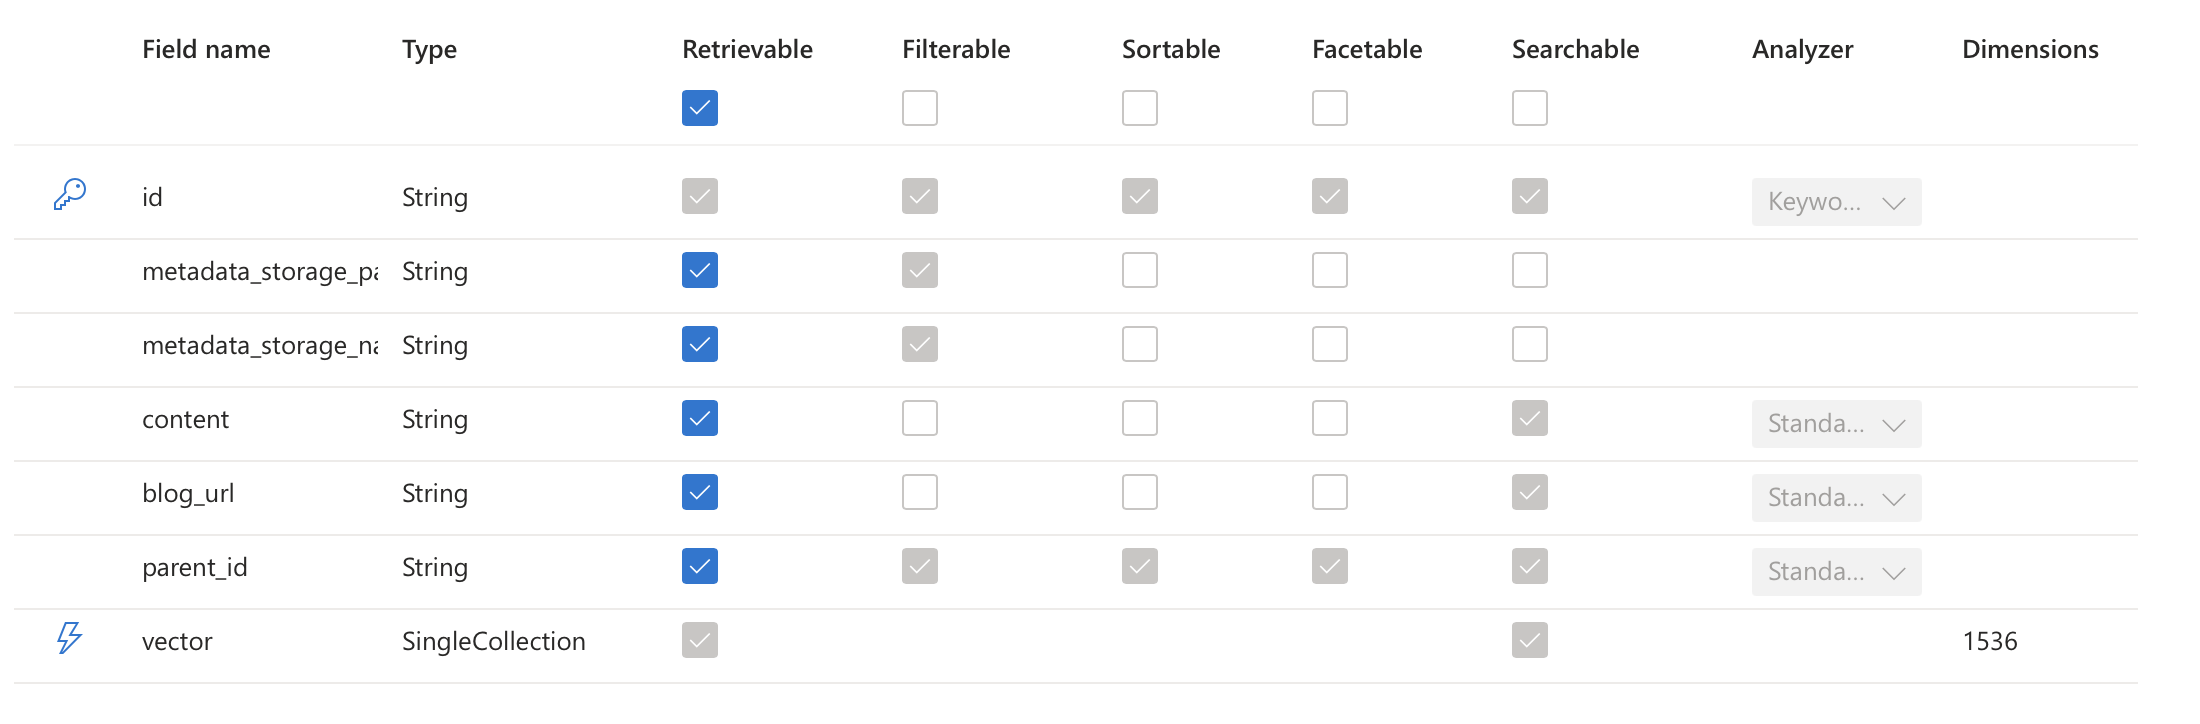
We are going to define the same fields as last time, with three difference:
- id field gets the keyword analyzer
- there is a new field parent_id, which will be used to maintain the relationship between different pieces of content within the index, especially when documents are transformed or enriched by cognitive skills (more on that later)
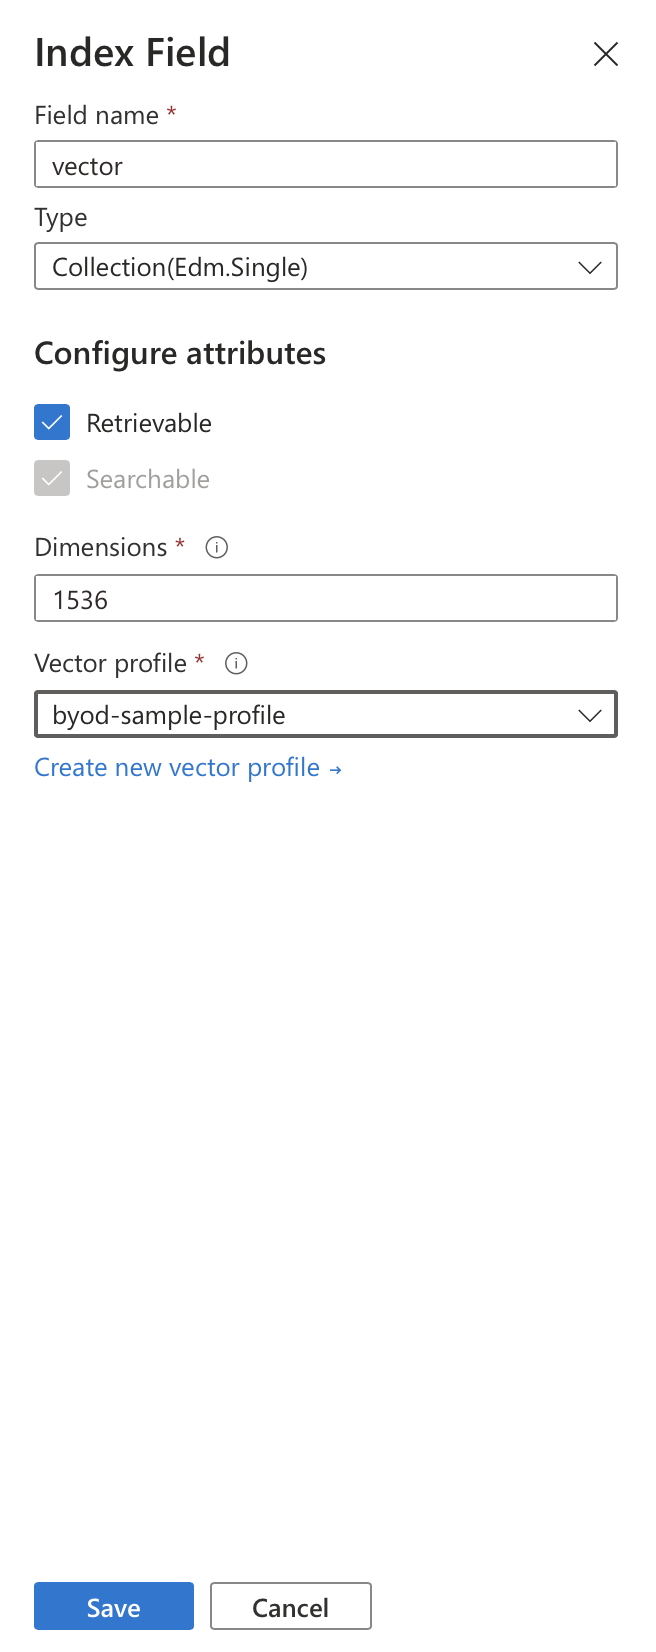
- another new field is vector, which is where we will index the vectorized content (the embedding). It is of type SingleCollection and has 1536 dimensions. The amount of those dimensions matches the dimensions of the vectors created by the OpenAI text-embedding-ada-002 model (as discussed already)
Built-in AI Search vectorization 🔗
Since recently, Azure AI Search supports built-in vectorization - for both queries and indexing. In the first case, a normal text based query can be converted to an embedding on the fly, and that vector is then used to perform the lookup. This is of course very convenient, as it does not require the calling application to communicate with the embedding model.
In the indexing case, it is possible to configure AI Search in such a way, that as the data gets indexed, relevant content chunks are automatically vectorized using the embedding model of our choice. With that, we do not need to be responsible for supplying the ready-made embeddings to the indexer, but the AI Search takes care of that for us. This simplifies greatly the process of preparing the content for the index.
Naturally, in both of these cases - querying and indexing - the embedding model used must be the same, otherwise they would not be compatible with each other.
Query vectorization 🔗
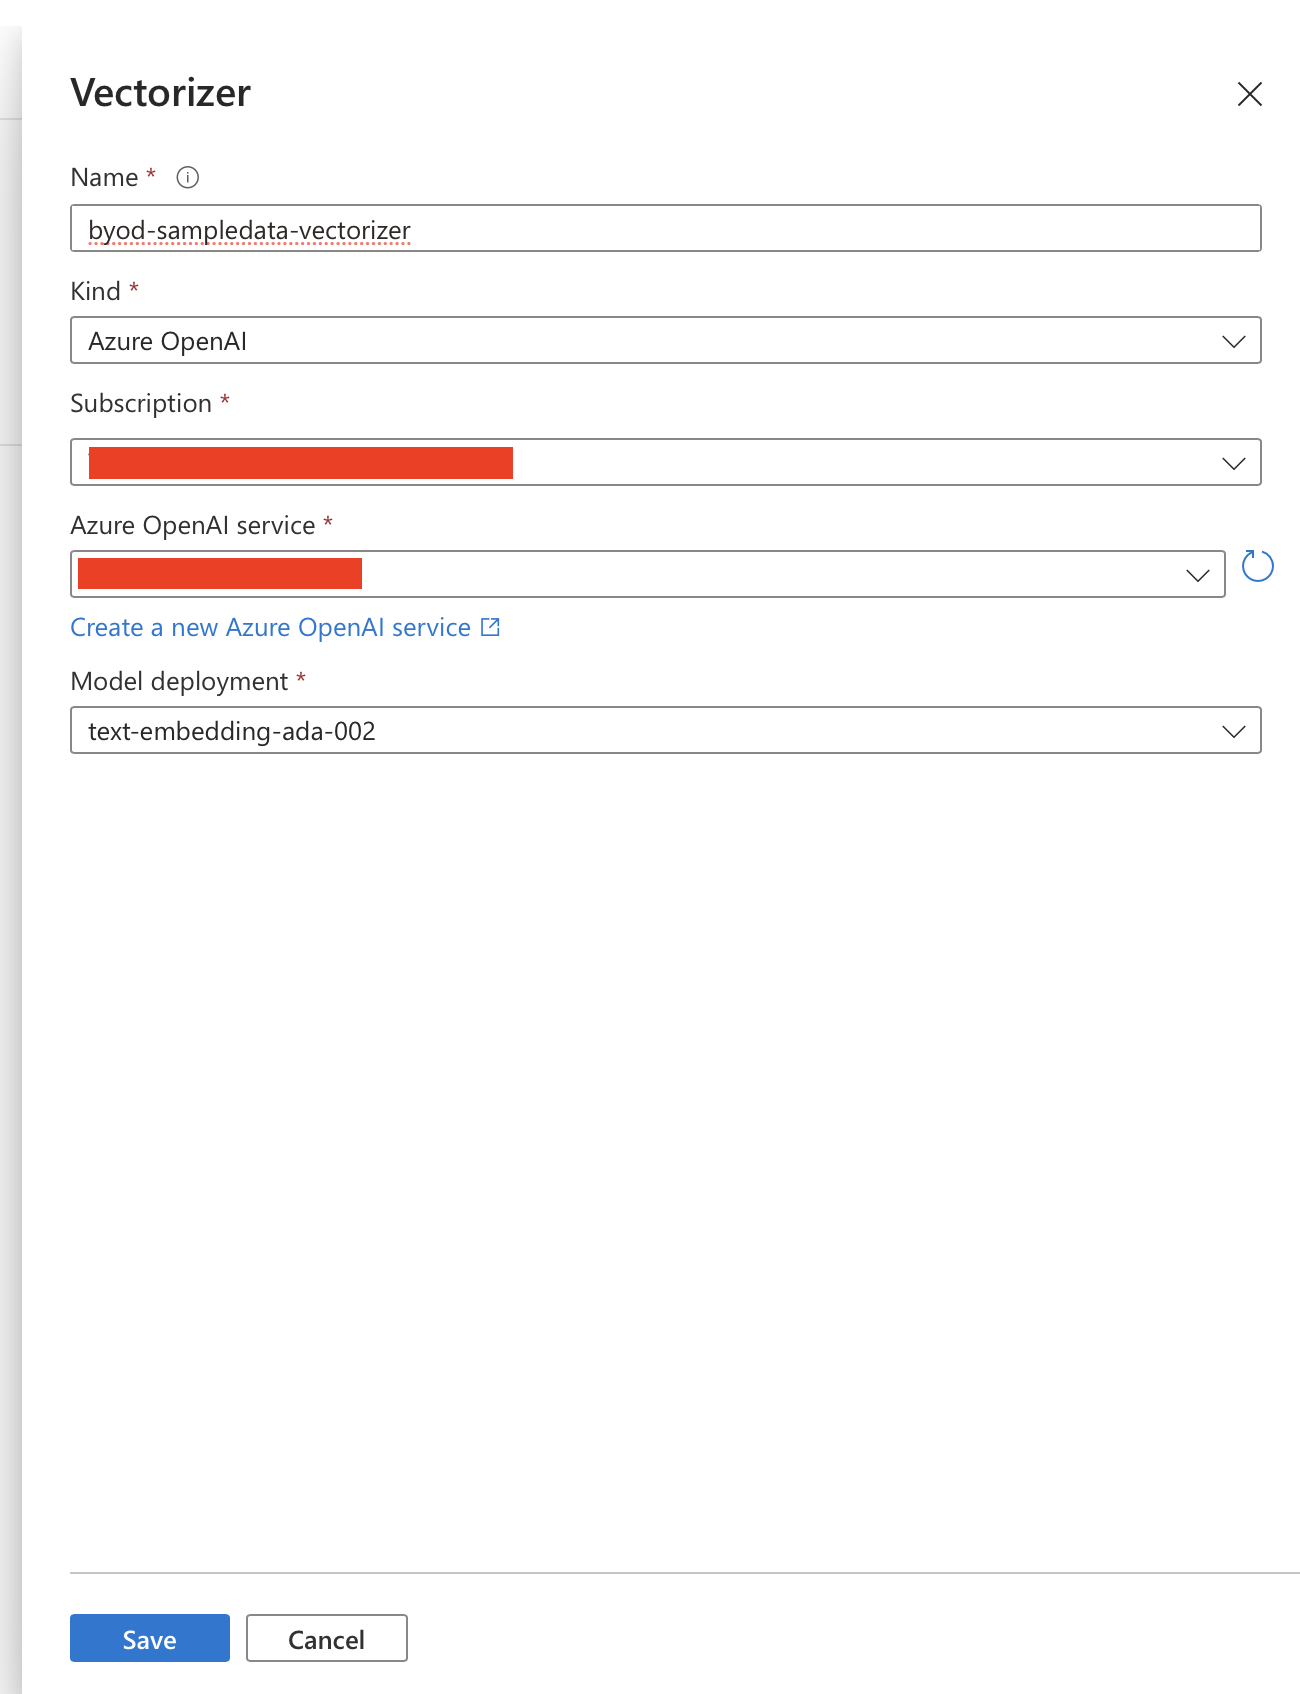
Let’s first add support for vectorization in queries, which is done by adding a vector profile to the index. The vector profile consists of the vectorizer, which is responsible for creating the embedding and which can be directly connected to a model deployed to Azure OpenAI Search, as shown in the screenshot below:
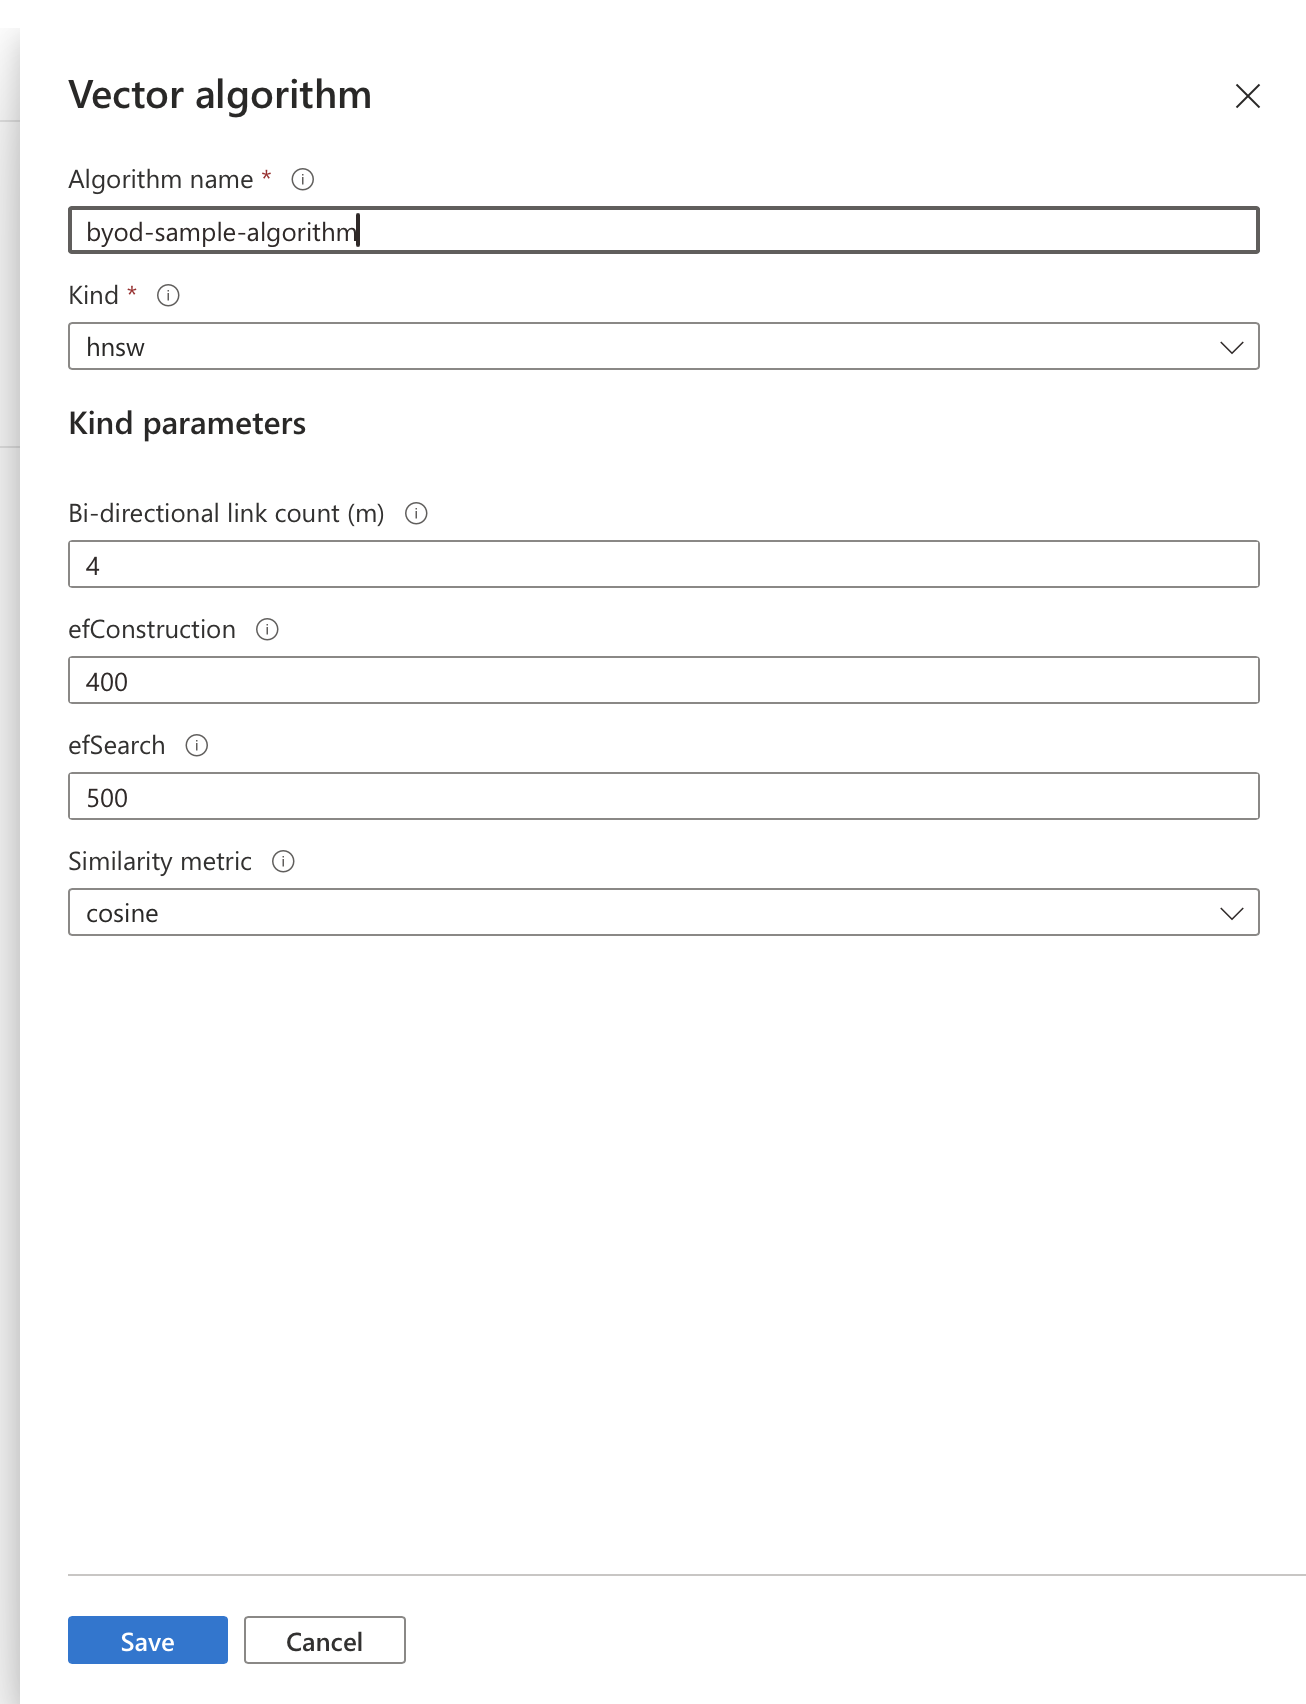
The second part is the vector algorithm, which is responsible for performing the search:
The two are brought together to create the aforementioned vector profile within a given index:
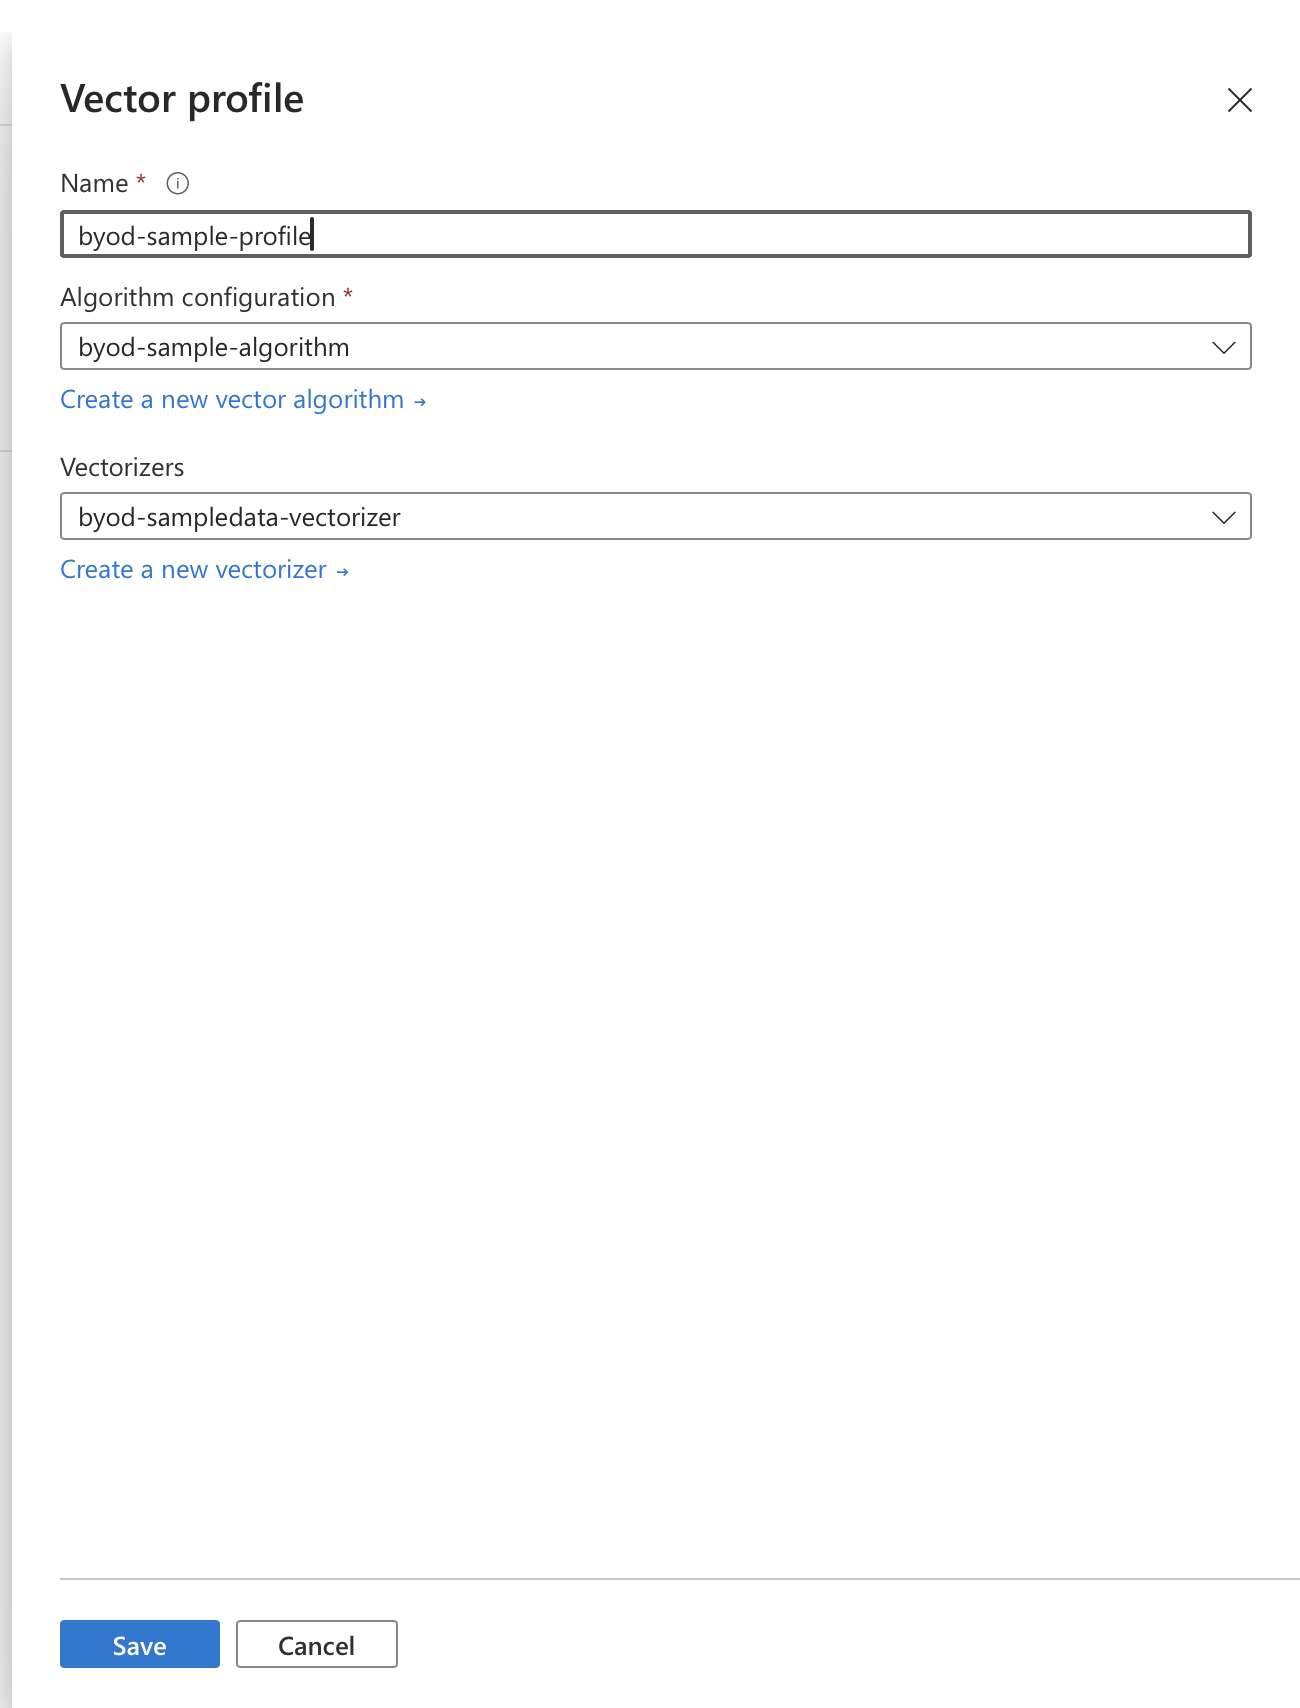
And once created, the profile can be assigned to a vector field in that index:
Indexing vectorization 🔗
Next, we will set up automatic content vectorization upon indexing, which is something that can be added by enabling a relevant skill in the Azure AI Search skillset. The vectorization skill is called AzureOpenAIEmbeddingSkill and can be added to the search by navigating to the Skillsets tab in the portal and choosing “Add a skillset”:
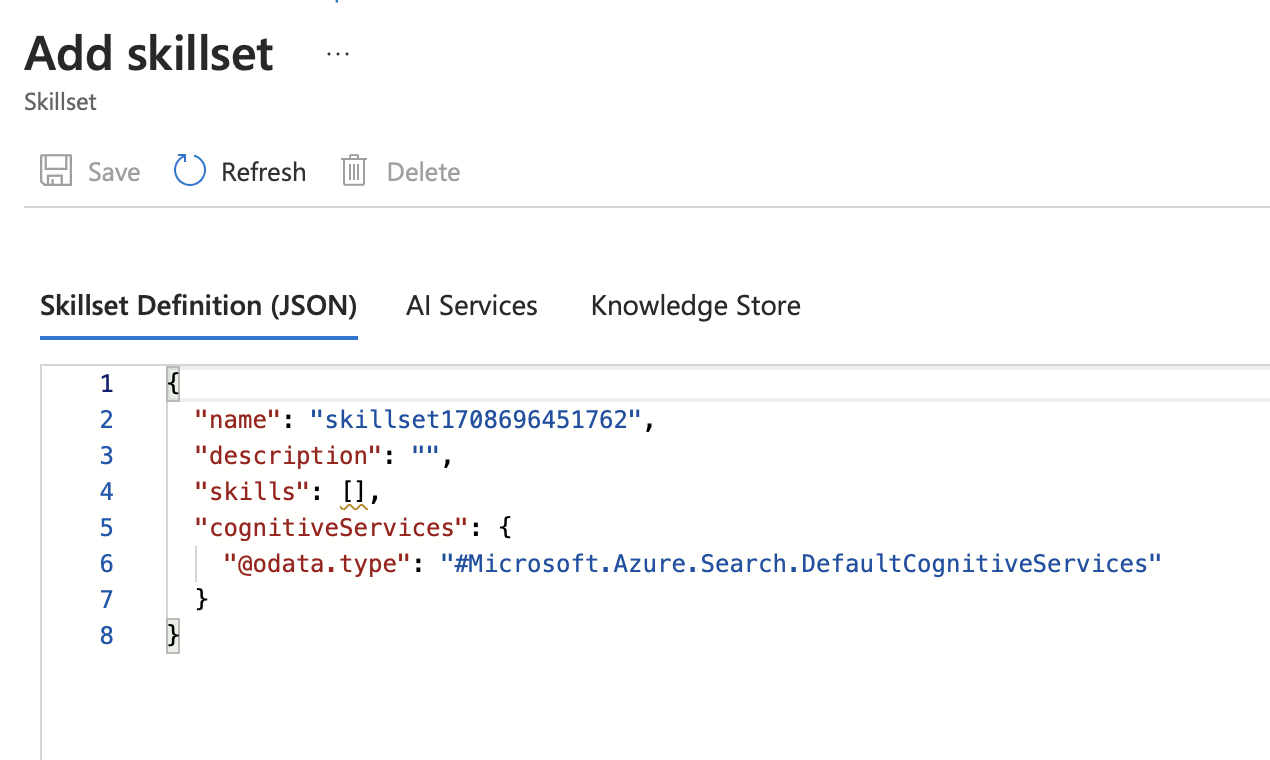
The skills are created and edited in the raw JSON form, and the particular AzureOpenAIEmbeddingSkill requires us to define the input (data to be vectorized), the output (the vector field, in our case named vector) and the necessary connection details to our vectorization model. This is shown in the JSON below, representing a skill that should be added to the skills array. It vectorizes the entire content of the indexed document.
{
  "@odata.type": "#Microsoft.Skills.Text.AzureOpenAIEmbeddingSkill",
  "name": "#1",
  "description": null,
  "context": "/document",
  "resourceUri": "https://{YOUR_AZURE_OPENAI_RESOURCE}.openai.azure.com",
  "apiKey": "{YOUR_AZURE_OPENAI_RESOURCE}",
  "deploymentId": "{YOUR_AZURE_OPENAI_EMBEDDING_MODEL_NAME}",
  "inputs": [
    {
      "name": "text",
      "source": "/document/content"
    }
  ],
  "outputs": [
    {
      "name": "embedding",
      "targetName": "vector"
    }
  ],
  "authIdentity": null
}
We should also provide an index projection, which is a top-level property (sibling to skills). This allows us to define the index on which the skill will act. We also have to make sure to project the existing fields as well, otherwise the only thing that will get indexed would be the vectorized data.
The example below assumes the index we created before is called strathweb-documents-vector.
  "indexProjections": {
    "selectors": [
      {
        "targetIndexName": "strathweb-documents-vector",
        "parentKeyFieldName": "parent_id",
        "sourceContext": "/document",
        "mappings": [
          {
            "name": "vector",
            "source": "/document/vector",
            "sourceContext": null,
            "inputs": []
          },
          {
            "name": "metadata_storage_path",
            "source": "/document/metadata_storage_path",
            "sourceContext": null,
            "inputs": []
          },
          {
            "name": "metadata_storage_name",
            "source": "/document/metadata_storage_name",
            "sourceContext": null,
            "inputs": []
          },
          {
            "name": "content",
            "source": "/document/content",
            "sourceContext": null,
            "inputs": []
          },
          {
            "name": "blog_url",
            "source": "/document/blog_url",
            "sourceContext": null,
            "inputs": []
          }
        ]
      }
    ],
    "parameters": {
      "projectionMode": "skipIndexingParentDocuments"
    }
  },
And that’s everything that is needed to set up automatic vectorization upon indexing. With this in place, all that is left is to attach a skillset to the indexer, which is something that is done upon indexer creation.
However, before we go out and enjoy this new integration, we have to remember something about embeddings - which we already covered in the post about them. The vectorized content cannot be too long, for example text-embedding-ada-002 model has a token limit of 8192 tokens. If the content we are indexing is already guaranteed to be shorter, then we have no issue - however because in this sample I am using my blog post articles some of them might be too big and the embedding creation would fail. We can easily solve this by adding an extra skill, this time the built-in text split skill, which will chunk the content into smaller parts, before vectorizing it. It is shown below:
{
  "@odata.type": "#Microsoft.Skills.Text.SplitSkill",
  "name": "#2",
  "description": "Split skill to chunk documents",
  "context": "/document",
  "defaultLanguageCode": "en",
  "textSplitMode": "pages",
  "maximumPageLength": 2000,
  "pageOverlapLength": 400,
  "maximumPagesToTake": 0,
  "inputs": [
    {
      "name": "text",
      "source": "/document/content"
    }
  ],
  "outputs": [
    {
      "name": "textItems",
      "targetName": "pages"
    }
  ]
}
Since a token is roughly four characters, we set the limit to 2000 characters per chunk. The SplitSkill will therefore create a collection of “pages” for every piece of content we index. Because of that, we need to now update the index projection to operate on collections (that’s the asterisk syntax):
  "indexProjections": {
    "selectors": [
      {
        "targetIndexName": "strathweb-documents-vector",
        "parentKeyFieldName": "parent_id",
        "sourceContext": "/document/pages/*",
        "mappings": [
          {
            "name": "content",
            "source": "/document/pages/*",
            "sourceContext": null,
            "inputs": []
          },
          {
            "name": "vector",
            "source": "/document/pages/*/vector",
            "sourceContext": null,
            "inputs": []
          },
          {
            "name": "metadata_storage_path",
            "source": "/document/metadata_storage_path",
            "sourceContext": null,
            "inputs": []
          },
          {
            "name": "metadata_storage_name",
            "source": "/document/metadata_storage_name",
            "sourceContext": null,
            "inputs": []
          }
        ]
      }
    ],
    "parameters": {
      "projectionMode": "skipIndexingParentDocuments"
    }
  },
And with that, we can run the indexer!
Updating the client application 🔗
In part 3 of this series we introduced a client application based on .NET SDK which was capable of acting as a frontend “Bring Your Own Data” client for our Azure OpenAI Service. Let’s now extend it with support for vector search. I will only focus on the diff-changes here to not repeat stuff, but if things do not make sense, make sure to check out the source code at the end of this post.
Thankfully, this requires just a few minimal tweaks. First let’s add an embedding endpoint to AzureOpenAiContext:
    /// <summary>
    /// URL of the embedding endpoint for vectorization
    /// Used when AzureSearchQueryType is vector (or related)
    /// </summary>
    public string EmbeddingEndpoint { get; init; }
This is going to be needed so that Azure OpenAI Service would perform the vectorization of the search query. But wait - didn’t we already set it up in AI Search? Yes we did, and ideally the orchestrator inside Azure OpenAI would use that, but this is currently not supported, instead we need to equip Azure OpenAI Service with the possibility to access our embedding endpoint, let it perform the vectorization there and then query by vector. Note that Azure OpenAI Service requires the full URL for the embedding endpoint (not just the deployment model name).
Next we will make sure the embedding endpoint and the key are passed over in the request to Azure OpenAI Service, namely in ChatCompletionsOptions > AzureChatExtensionsOptions > AzureCognitiveSearchChatExtensionConfiguration, where we set two additional properties (which we previously ignored):
EmbeddingEndpoint =
    context.AzureSearchQueryType is "vector" ? new Uri(context.EmbeddingEndpoint) : null,
EmbeddingKey =
    context.AzureSearchQueryType is "vector" ? contextAzureOpenAiServiceKey : null
This assumes that the key to our embedding model and the main service are the same - they don’t need to though, it would depend on your deployment topology.
Finally, we need to update the entrypoint to read the embedding endpoint, and to set the query mode to “vector” whenever we would like to use it. Without complicating things further, we can have a command line flag that decides that:
var isVector = args.FirstOrDefault()?.ToLowerInvariant() == "vector";
Then the AzureSearchQueryType is no longer “simple” but:
AzureSearchQueryType = isVector ? "vector" : "simple",
and the embedding endpoint is also conditionally populated:
EmbeddingEndpoint = isVector ? (Environment.GetEnvironmentVariable("AZURE_OPENAI_EMBEDDING_ENDPOINT") ?? throw new ArgumentException("AZURE_OPENAI_EMBEDDING_ENDPOINT is mandatory")) : null,
These are all the changes necessary - and the application can now be used with vector search! Give it a try and let me know how it goes.
You can find the source code for this blog post on Github.