In this post we will have a look at how we can utilize Azure OpenAI Service to build applications using various OpenAI models. At the high level, Azure OpenAI allows accessing GPT-4, GPT-3, Codex and Embeddings models using the security boundary of Azure, and while ensuring data privacy and residency and conforming to other common enterprise requirements such as private networking.
In other words, it addresses one of the biggest worries of integrating AI services into own applications - the data is never shared with OpenAI. The data submitted to Azure OpenAI Services is not used to further train any models in the future and is not accessed or used for any other purposes. Similarly to other Azure offerings, data can also be protected using customer-owned encryption keys.
Setting up Azure OpenAI Service 🔗
Before diving into the process of building the application, it’s essential to understand the prerequisites and the process involved in setting up the Azure OpenAI Service. Contrary to most of the other Azure services, which can typically simply be provisioned on demand, setting up Azure OpenAI is a bit more complicated.
Microsoft has defined a set of guidelines, policies and principles related to their commitment to responsible AI, and as a consequence requires a previous application and manual vetting process before granting access to the service. It is also necessary to upfront describe the use case for which the AI service will be created. Attempting to set up the service via Azure Portal or other automation tool will end in an error without that. This process might look differently in the future, but for now this manual vetting step is mandatory.
This process can be triggered here, and may take some time, so patience may be needed.
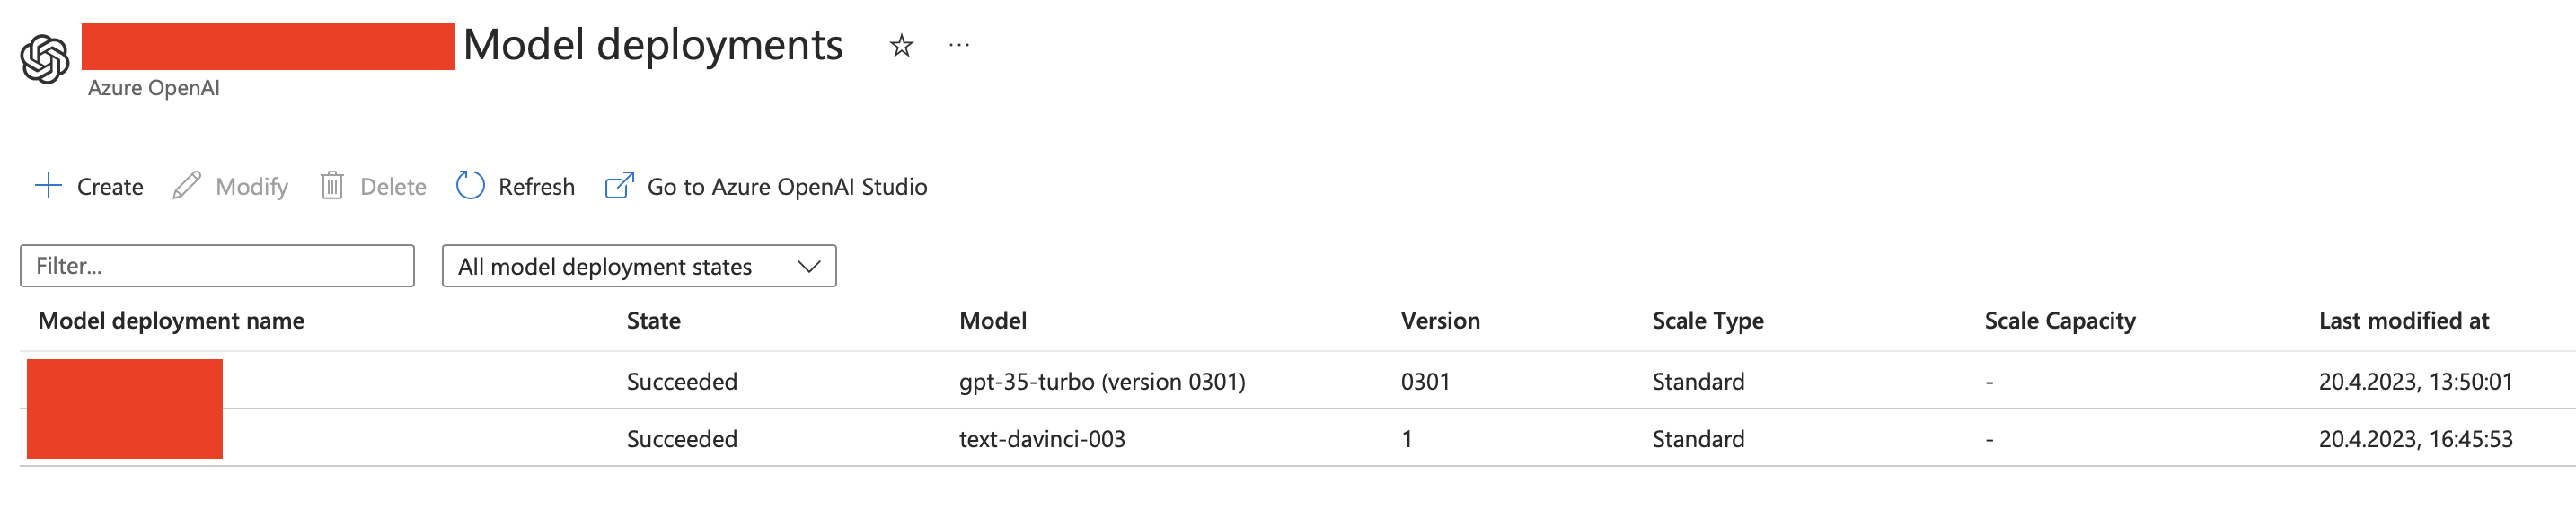
Once the application is approved, one is granted permission to create the Azure OpenAI Services within the specific subscription. The service can then be used to deploy GPT-3, Codex, and Embeddings models (GPT-4 is available too, but in preview, and requires a separate application process) and build applications that interact with them (within the limits defined during the application procedure).
An additional web interface called Azure OpenAI Studio is provided as well, and can be used to manage the deployments and as a playground to interact with the various models (we are going to return to it later in this post).
Building a demo AI-powered app 🔗
We are going to build the following small application which will be enhanced with the power of AI. First, we will reach out to arXiv, to fetch the list of latest papers published under the “Quantum Physics” category. Then, we will ask Azure OpenAI Service to use the text-davinci-003 model to rate each article in terms of their relevance to programming quantum computers. Then we shall present the ranked results to the user, who is then equipped with an AI-assisted overview of latest quantum physics papers published on arXiv, hopefully improving their daily experience of exploring the newly available content.
To make that happen, we need to first go through the steps of creating an Azure OpenAI Service and then deploy the model we need (text-davinci-003).
Bootstrapping the project and calling arXiv 🔗
We will start by creating a new dotnet console application, and add a reference to the Azure OpenAI Nuget package (currently only available as preview), which is the official .NET SDK for Azure OpenAI Service:
mkdir Strathweb.Samples.AzureOpenAI
cd Strathweb.Samples.AzureOpenAI
dotnet new console
dotnet package add Azure.AI.OpenAI --prerelease
That package is not mandatory, as we could interact with our service using the REST API too, but it will make our life easier. Once that is bootstrapped, we can start by adding the logic to fetch the current papers from arXiv. arXiv has an API that can be used for that purpose, and which is publicly accessible and can be very easily integrated without needing to generate any API keys.
To facilitate that, we shall introduce a Feed type, which we will then use to deserialize the API response. The property names match the JSON property names returned by arXiv.
public class Feed
{
    public string Title { get; set; }
    public string Id { get; set; }
    public DateTime Updated { get; set; }
    public int TotalResults { get; set; }
    public int StartIndex { get; set; }
    public int ItemsPerPage { get; set; }
    public List<Entry> Entries { get; set; }
}
The individual articles will be captured by the Entry type, which is shown below:
public class Entry
{
    public string Id { get; set; }
    public int Rating { get; set; }
    public DateTime Updated { get; set; }
    public DateTime Published { get; set; }
    public string Title { get; set; }
    public string Summary { get; set; }
    public List<Author> Authors { get; set; }
    public string PdfLink { get; set; }
    public string PrimaryCategory { get; set; }
    public List<string> Categories { get; set; }
}
Finally, the Author type contains just the name:
public class Author
{
    public string Name { get; set; }
}
The arXiv ID is not surfaced as individual property, but we can extract it from the link, as it is the last part of the link. We also introduce here a Rating property which we will require later - it will be populated by AI.
Next, we need to add the code that will fetch the API response from arXiv. The URL is export.arxiv.org/api/query?search_query=, and what follows is a number of query string parameters that we need to pass to customize our query.
In our case, we are specifically interested in:
- quantum physics category, so we will add cat:quant-ph to the query
- restricting papers by date so that we only process a batch from a given date. This can be achieved by adding +AND+submittedDate:[202304210000+TO+202304212359] to the previous query (in this case using 21 April 2023 as an example date to filter on). This is not the most elegant approach, but to my knowledge there is no easier way to filter by date in the arXiv API
- starting the result retrieval from the beginning, so we add &index=0
- limiting the results at 100 (default is 10), so we add &max_results=100
The overall query looks like this:
http://export.arxiv.org/api/query?
    search_query=cat:quant-ph+AND+submittedDate:[202304210000+TO+202304212359]
    &start=0
    &max_results=100
With that in place, we can write the code to call the API, fetch the results and deserialize them into our Feed type. One thing worth noting is that arXiv API does not return JSON, but XML only, so we will need to account for that in the deserialization code. All of that code is shown below:
var date = args.Length == 1 ? args[0] : DateTime.UtcNow.ToString("yyyyMMdd");
var feedUrl = $"http://export.arxiv.org/api/query?search_query=cat:quant-ph+AND+submittedDate:[{date}0000+TO+{date}2359]&start=0&max_results=100&sortBy=submittedDate&sortOrder=descending";
var httpClient = new HttpClient();
var httpResponse = await httpClient.GetAsync(feedUrl);

Feed feed = null;
if (httpResponse.IsSuccessStatusCode)
{
    var ns = XNamespace.Get("http://www.w3.org/2005/Atom");
    var opensearch = XNamespace.Get("http://a9.com/-/spec/opensearch/1.1/");
    var arxiv = XNamespace.Get("http://arxiv.org/schemas/atom");

    var xmlContent = await httpResponse.Content.ReadAsStringAsync();
    var xDoc = XDocument.Parse(xmlContent);
    var feedElement = xDoc.Element(ns + "feed");

    feed = new Feed
    {
        Title = (string)feedElement.Element(ns + "title"),
        Id = (string)feedElement.Element(ns + "id"),
        Updated = (DateTime)feedElement.Element(ns + "updated"),
        TotalResults = (int)feedElement.Element(opensearch + "totalResults"),
        StartIndex = (int)feedElement.Element(opensearch + "startIndex"),
        ItemsPerPage = (int)feedElement.Element(opensearch + "itemsPerPage"),
        Entries = feedElement.Elements(ns + "entry").Select(entryElement => new Entry
        {
            Id = ((string)entryElement.Element(ns + "id")).Split("/").Last(),
            Updated = (DateTime)entryElement.Element(ns + "updated"),
            Published = (DateTime)entryElement.Element(ns + "published"),
            Title = (string)entryElement.Element(ns + "title"),
            Summary = (string)entryElement.Element(ns + "summary"),
            Authors = entryElement.Elements(ns + "author").Select(authorElement => new Author
            {
                Name = (string)authorElement.Element(ns + "name")
            }).ToList(),
            PdfLink = entryElement.Elements(ns + "link").FirstOrDefault(link => (string)link.Attribute("title") == "pdf")?.Attribute("href")?.Value,
            PrimaryCategory = (string)entryElement.Element(arxiv + "primary_category")?.Attribute("term")?.Value,
            Categories = entryElement.Elements(ns + "category").Select(category => (string)category.Attribute("term")).ToList()
        }).ToList()
    };
}

if (feed == null)
{
    Console.WriteLine("Failed to load the feed.");
    return;
}
We construct the URL to call based on the current date, or based on the date passed to the program as an argument. arXiv indexing is often delayed, so it is possible that querying for “today” or even “yesterday” may yield 0 results. However, by allowing the date to be chosen as parameter, we can navigate the calendar days however we wish.
If the response is successful, we will use the types from the System.Xml.Linq namespace (boy, have I not used them for a while) to deserialize the response. Some of the elements are namespaces in a specific fashion so we need to observe that too.
Interacting with Azure OpenAI Service 🔗
Once the feed is successfully obtained, we can proceed to the core exercise for today, namely to use Azure OpenAI Service to recommend the papers that should be interesting to us, with the criteria being, of course, their relevance to programming quantum computers.
In order to call the Azure OpenAI Service, we need three main pieces of information: the service URL, the API key and our model deployment name. To allow these to be easily switched, without needing to recompile the program, we will load them from environment variables.
async Task<RatedArticleResponse[]> GetAIRatings(Feed feed)
{
    var azureOpenAiServiceEndpoint = Environment.GetEnvironmentVariable("AZURE_OPENAI_SERVICE_ENDPOINT");
    var azureOpenAiServiceKey = Environment.GetEnvironmentVariable("AZURE_OPENAI_API_KEY");
    var azureOpenAiDeploymentName = Environment.GetEnvironmentVariable("AZURE_OPENAI_DEPLOYMENT_NAME");

    // to follow
}
Next, we will initialize the Azure OpenAI client, from the NuGet package we installed in the beginning - Azure.AI.OpenAI. We will need the endpoint and the key for that.
var client = new OpenAIClient(new Uri(azureOpenAiServiceEndpoint),
    new AzureKeyCredential(azureOpenAiServiceKey));
The interaction with our model is effectively a completion exercise - we will be providing the input text, and the model will simply provide a completion to it, based on our instructions.
In order to obtain a completion from the service, we first need to define the CompletionOptions:
var completionsOptions = new CompletionsOptions()
{
    Temperature = 0,
    MaxTokens = 2000,
    NucleusSamplingFactor = 1,
    FrequencyPenalty = 0,
    PresencePenalty = 0,
    GenerationSampleCount = 1,
};

var input = string.Join("\n", feed.Entries.Select(x => x.Id + ", " + x.Title));
The options allow us to tweak different “knobs” on the model. For example, the minimal value for the temperature means that the model will produce more repetitive and deterministic responses. Other values are documented here.
We also need to take the IDs and titles of our retrieved papers from arXiv, and prepare them to be fed into the model. We are doing that by concatenating them into a string, with entries separated by new lines.
The next step is to perform a little of prompt engineering, which might just be the hottest “programming” job of the future. Effectively, we are going to use natural language to define the context and the framework in which the model will operate. Properly constructed prompt is the absolute key for interacting with these large foundational models like GPT-3.5 or GPT-4. In many ways prompt engineering resembles requirements engineering - if you want a developer to perform a task accurately, you better describe it in detail!
In our example, the prompt will look as follows:
completionsOptions.Prompts.Add(
    """
Rate on a scale of 1-5 how relevant each headline is to quantum computing software engineers.
Titles mentioning quantum frameworks, software, algorithms, machine learning and error correction should be rated highly. Quantum computing hardware topics should be rated lower. Other quantum physics topics should get low rating. Produce JSON result as specified in the output example.

<Input>
1, Quantum Error Correction For Dummies.
2, Quantum Algorithm for Unsupervised Anomaly Detection
3, Fast quantum search algorithm modelling on conventional computers: Information analysis of termination problem.
4, A pedagogical revisit on the hydrogen atom induced by a uniform static electric field

<Output>
[
    {"Id": "1", "R": 5},
    {"Id": "2", "R": 5},
    {"Id": "3", "R": 4},
    {"Id": "4", "R": 1}
]

<Input>
""" + "\n" + input + "\n" + "<Output>"
);
Let’s unpack what is going on there. We give the model the task to rate - on a scale of 1-5 how relevant each headline is to quantum computing software engineers. We then provide some additional instructions about what is interesting to us, and what should be considered as less applicable.
We then show the model a specific example of how our input we will look like, and what is the output we are expecting. This is delimited using the arbitrary Input and Output tags. Notice that the input matches the format we used for concatenation of the feed entires we just did moments ago. The output, on the other hand is a JSON array of IDs and rating properties only. We do not need more - we can use the IDs to match the ratings to the actual feed afterwards. Such construct gives us performance benefit too, as the model does not need to spit out unnecessary data, and allows us to save the precious tokens - the GPT-3 and GPT-3.5 models are limited to 4000 tokens for combined input and output, where each token corresponds to roughly 4 characters (GPT-4 models have higher limits, up to 32 000 tokens). We are not being particularly defensive in our code here, because it is just a demo, however it is technically possible that we exceed the token limit if there are too many articles within one day. In normal applications, this is something that needs to be monitored and validated before submitting data to the Azure OpenAI Service - in such cases, we could break down our interactions into a number of queries, instead of a single one.
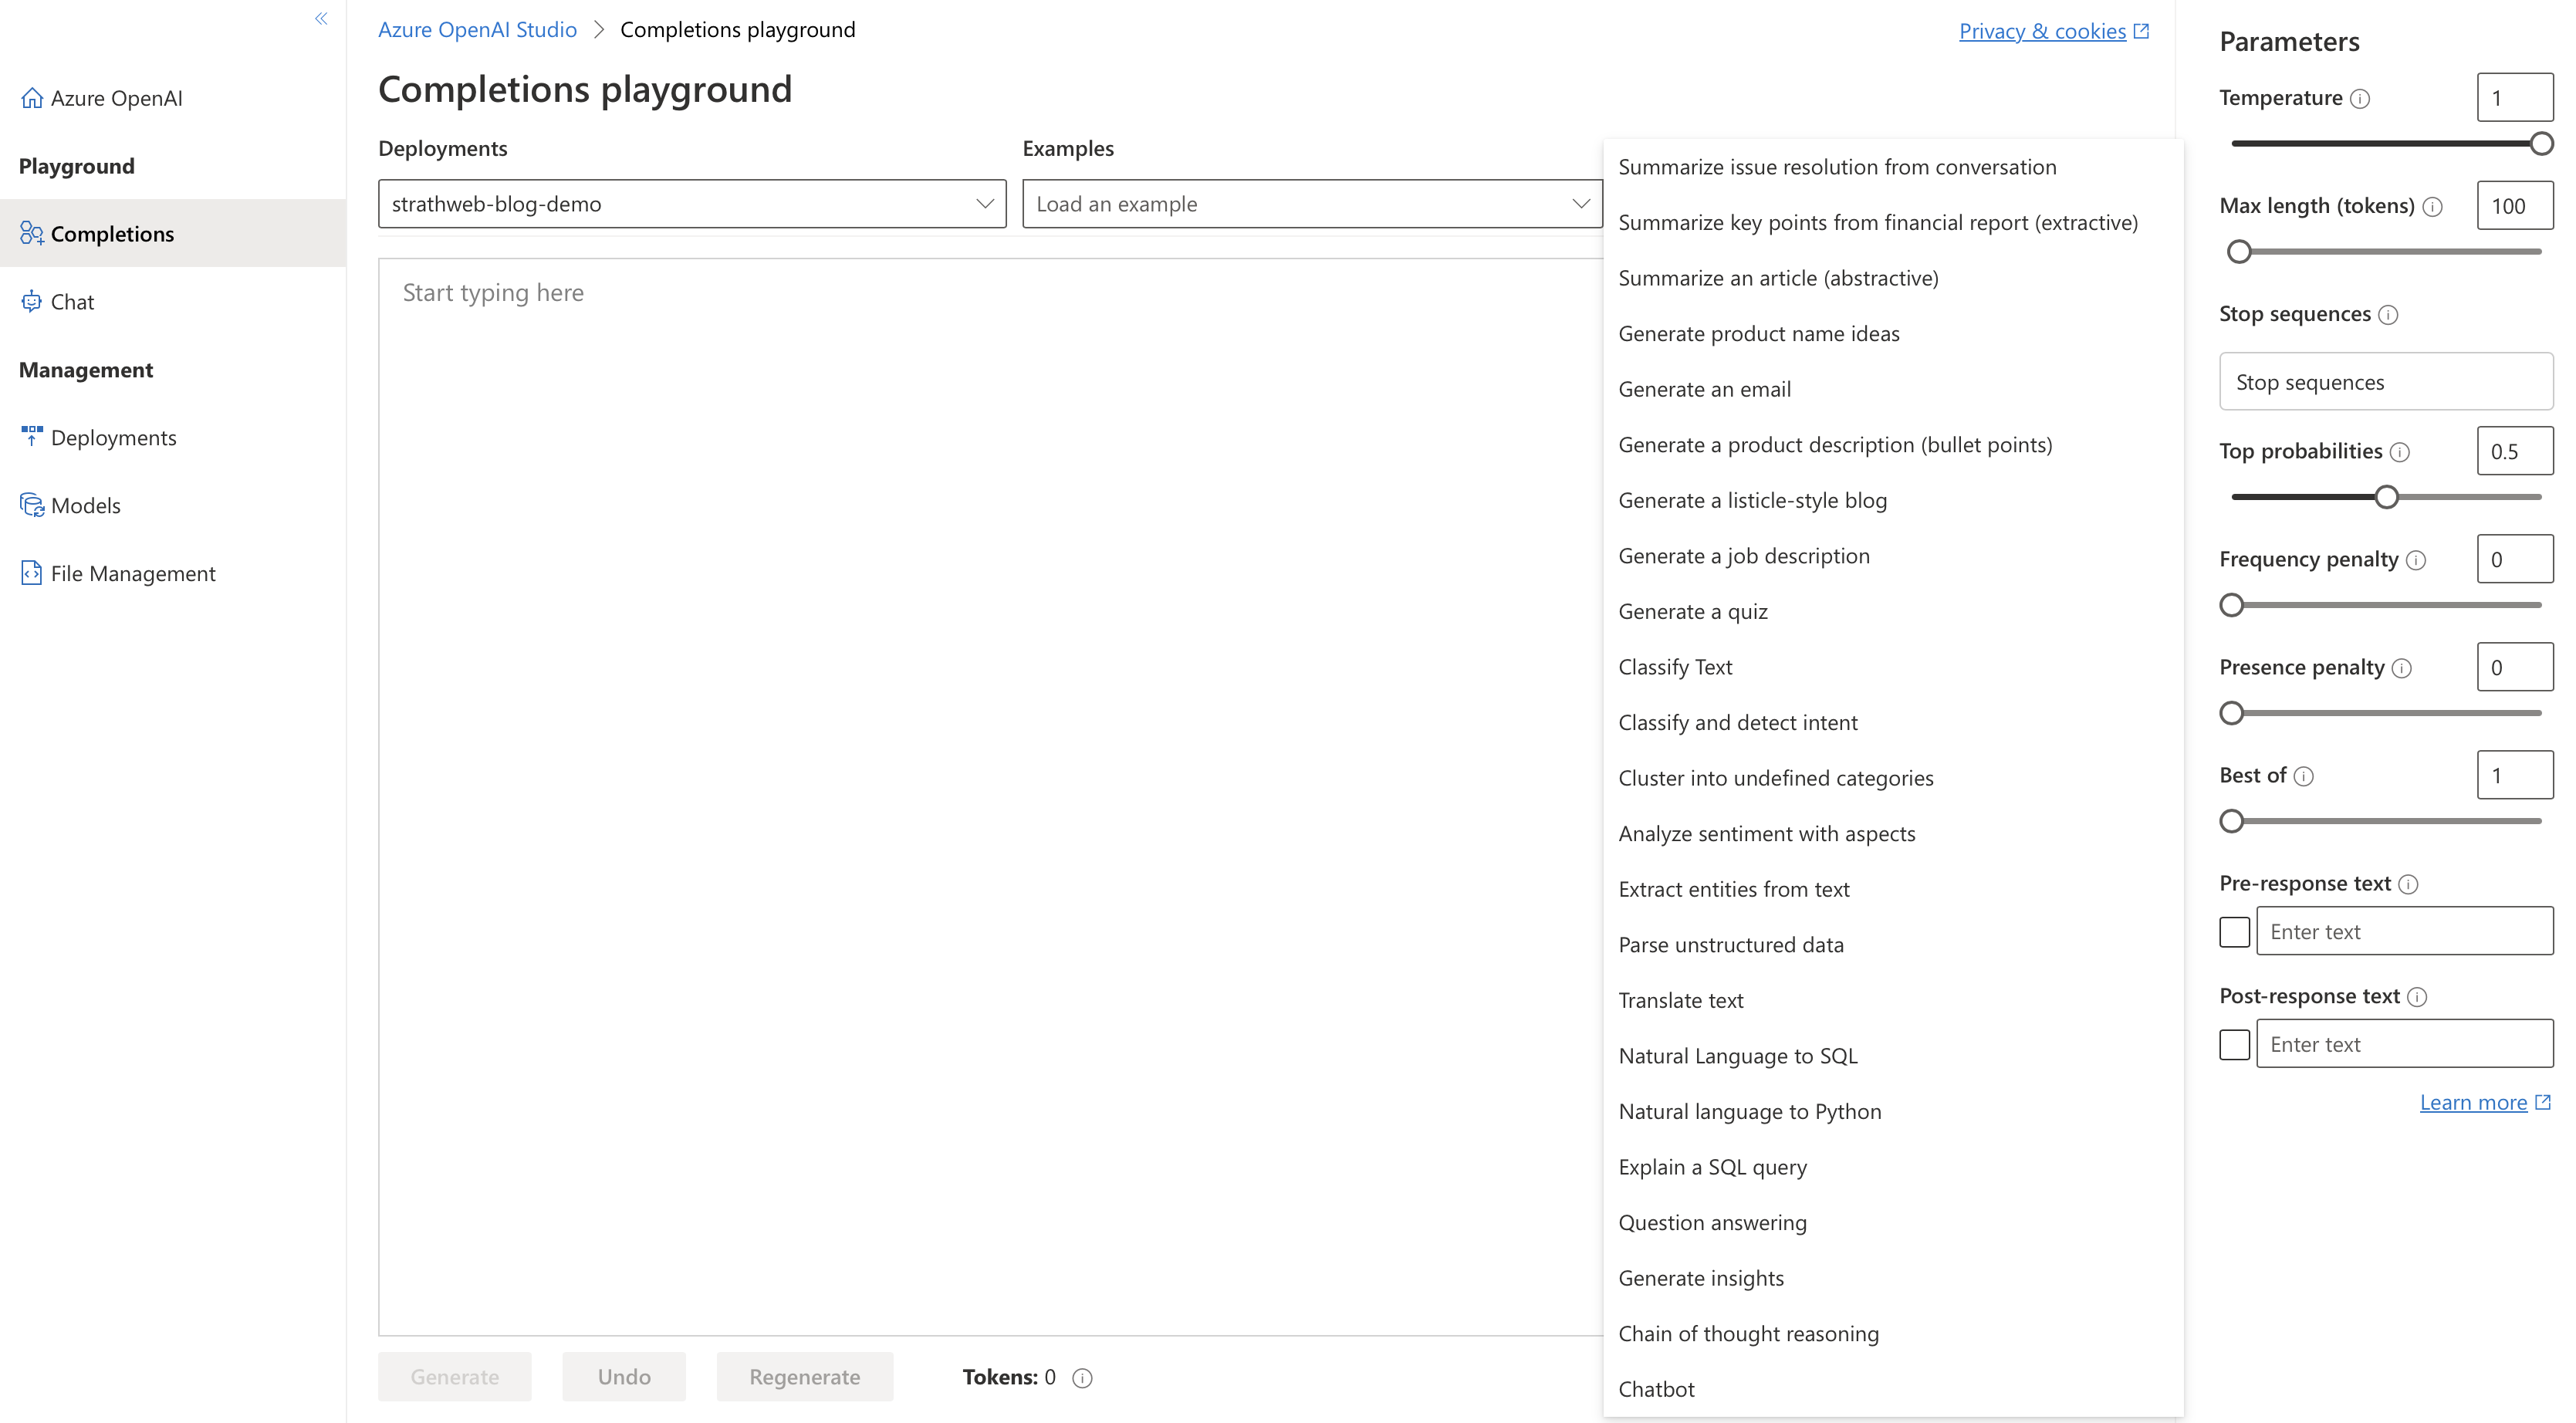
Prompt engineering is a delicate exercise, which requires a lot of trial and error. Azure OpenAI Studio comes with a “playground” where the inputs and completions can be interactively (and iteratively) tested without needing to write any application code, which is very convenient.
But back to our application. The final step is to simply submit that prompt to our service and fetch the completion:
var completionsResponse = await client.GetCompletionsAsync(azureOpenAiDeploymentName, completionsOptions);
if (completionsResponse.Value.Choices.Count == 0)
{
    Console.WriteLine("No completions found.");
    return Array.Empty<RatedArticleResponse>();
}

var preferredChoice = completionsResponse.Value.Choices[0];
var rawJsonResponse = preferredChoice.Text.Trim();
It is possible to hav multiple completions in the response, but we only expect one, so we grab that, and since we instructed the model to provide it in JSON format, we can deserialize the obtained completion string into a typed array. Again, this is a pretty naive assumption because it does not account for any possible errors, but it’s good enough for demo purposes.
var results = JsonSerializer.Deserialize<RatedArticleResponse[]>(rawJsonResponse);
return results;
RatedArticleResponse here is a simple type matching the JSON payloads we asked the model to produce.
public class RatedArticleResponse
{
    public string Id { get; set; }
    public int R { get; set; }
}
This completes GetAIRatings method, so we can go back to where we obtained the arXiv feed and glue everything together. We pass the feed into the method, and get back the array of ratings and IDs. We need to match them to the feed entries and copy the rating. The final step is to sort the feed by rating.
var results = await GetAIRatings(feed);
foreach (var rated in results)
{
    var existingEntry = feed.Entries.FirstOrDefault(x => x.Id == rated.Id);
    if (existingEntry != null)
    {
        existingEntry.Rating = rated.R;
    }
}

feed.Entries = feed.Entries.OrderByDescending(x => x.Rating).ThenByDescending(x => x.Updated).ToList();
By that point everything is ready to be rendered to the user.
Presenting the results 🔗
The result presentation is somewhat irrelevant to the actual content of this blog post, because it is just a UX aspect, but - despite being in the console environment only - it would of course make sense to have something nice in place.
To achieve that goal, let’s install a very cool Spectre.Console NuGet package, which is a set of widgets and helpers that can be used to create lovely console applications. The full documentation is available on the official site, so we will only breeze quickly through the code here.
In order to display the rated articles, we will add an extra method that will take care of that:
void WriteOutItems(Feed feed)
{
    if (feed.Entries.Count == 0)
    {
        Console.WriteLine("No items today...");
        return;
    }

    // to follow
}
If the retrieved feed has 0 results, we simply display that there are no articles available. However, if there is anything to show, we will render a Spectre.Console table, with the columns for the rating, the updated timestamp, title, authors and a direct link to the PDF.
var table = new Table
{
    Border = TableBorder.HeavyHead
};

table.AddColumn(new TableColumn("Rating").Centered());
table.AddColumn("Updated");
table.AddColumn("Title");
table.AddColumn("Authors");
table.AddColumn("Link");

foreach (var entry in feed.Entries)
{
    var color = entry.Rating switch
    {
        1 => "red",
        2 or 3 => "yellow",
        4 or 5 => "green",
        _ => "white"
    };
    table.AddRow(
        $"[{color}]{Markup.Escape(entry.Rating.ToString())}[/]",
        $"[{color}]{Markup.Escape(entry.Updated.ToString("yyyy-MM-dd HH:mm:ss"))}[/]",
        $"[{color}]{Markup.Escape(entry.Title)}[/]",
        $"[{color}]{Markup.Escape(string.Join(", ", entry.Authors.Select(x => x.Name).ToArray()))}[/]",
        $"[link={entry.PdfLink} {color}]{entry.PdfLink}[/]"
    );
}
Spectre.Console is not only capable of rendering an elegant table, but also supports its own markup syntax, which lets us color the rows nicely depending on the rating - for a better visual clue. Additionally, we can also render a proper link to the paper link, and if the given terminal supports it, it will be clickable.
The final step is to call the WriteOutItems method and pass in the feed entries, already annotated with the ratings.
WriteOutItems(feed);
If we now run our program, for example for the 20 April:
dotnet run 20230420
we should get the following output:
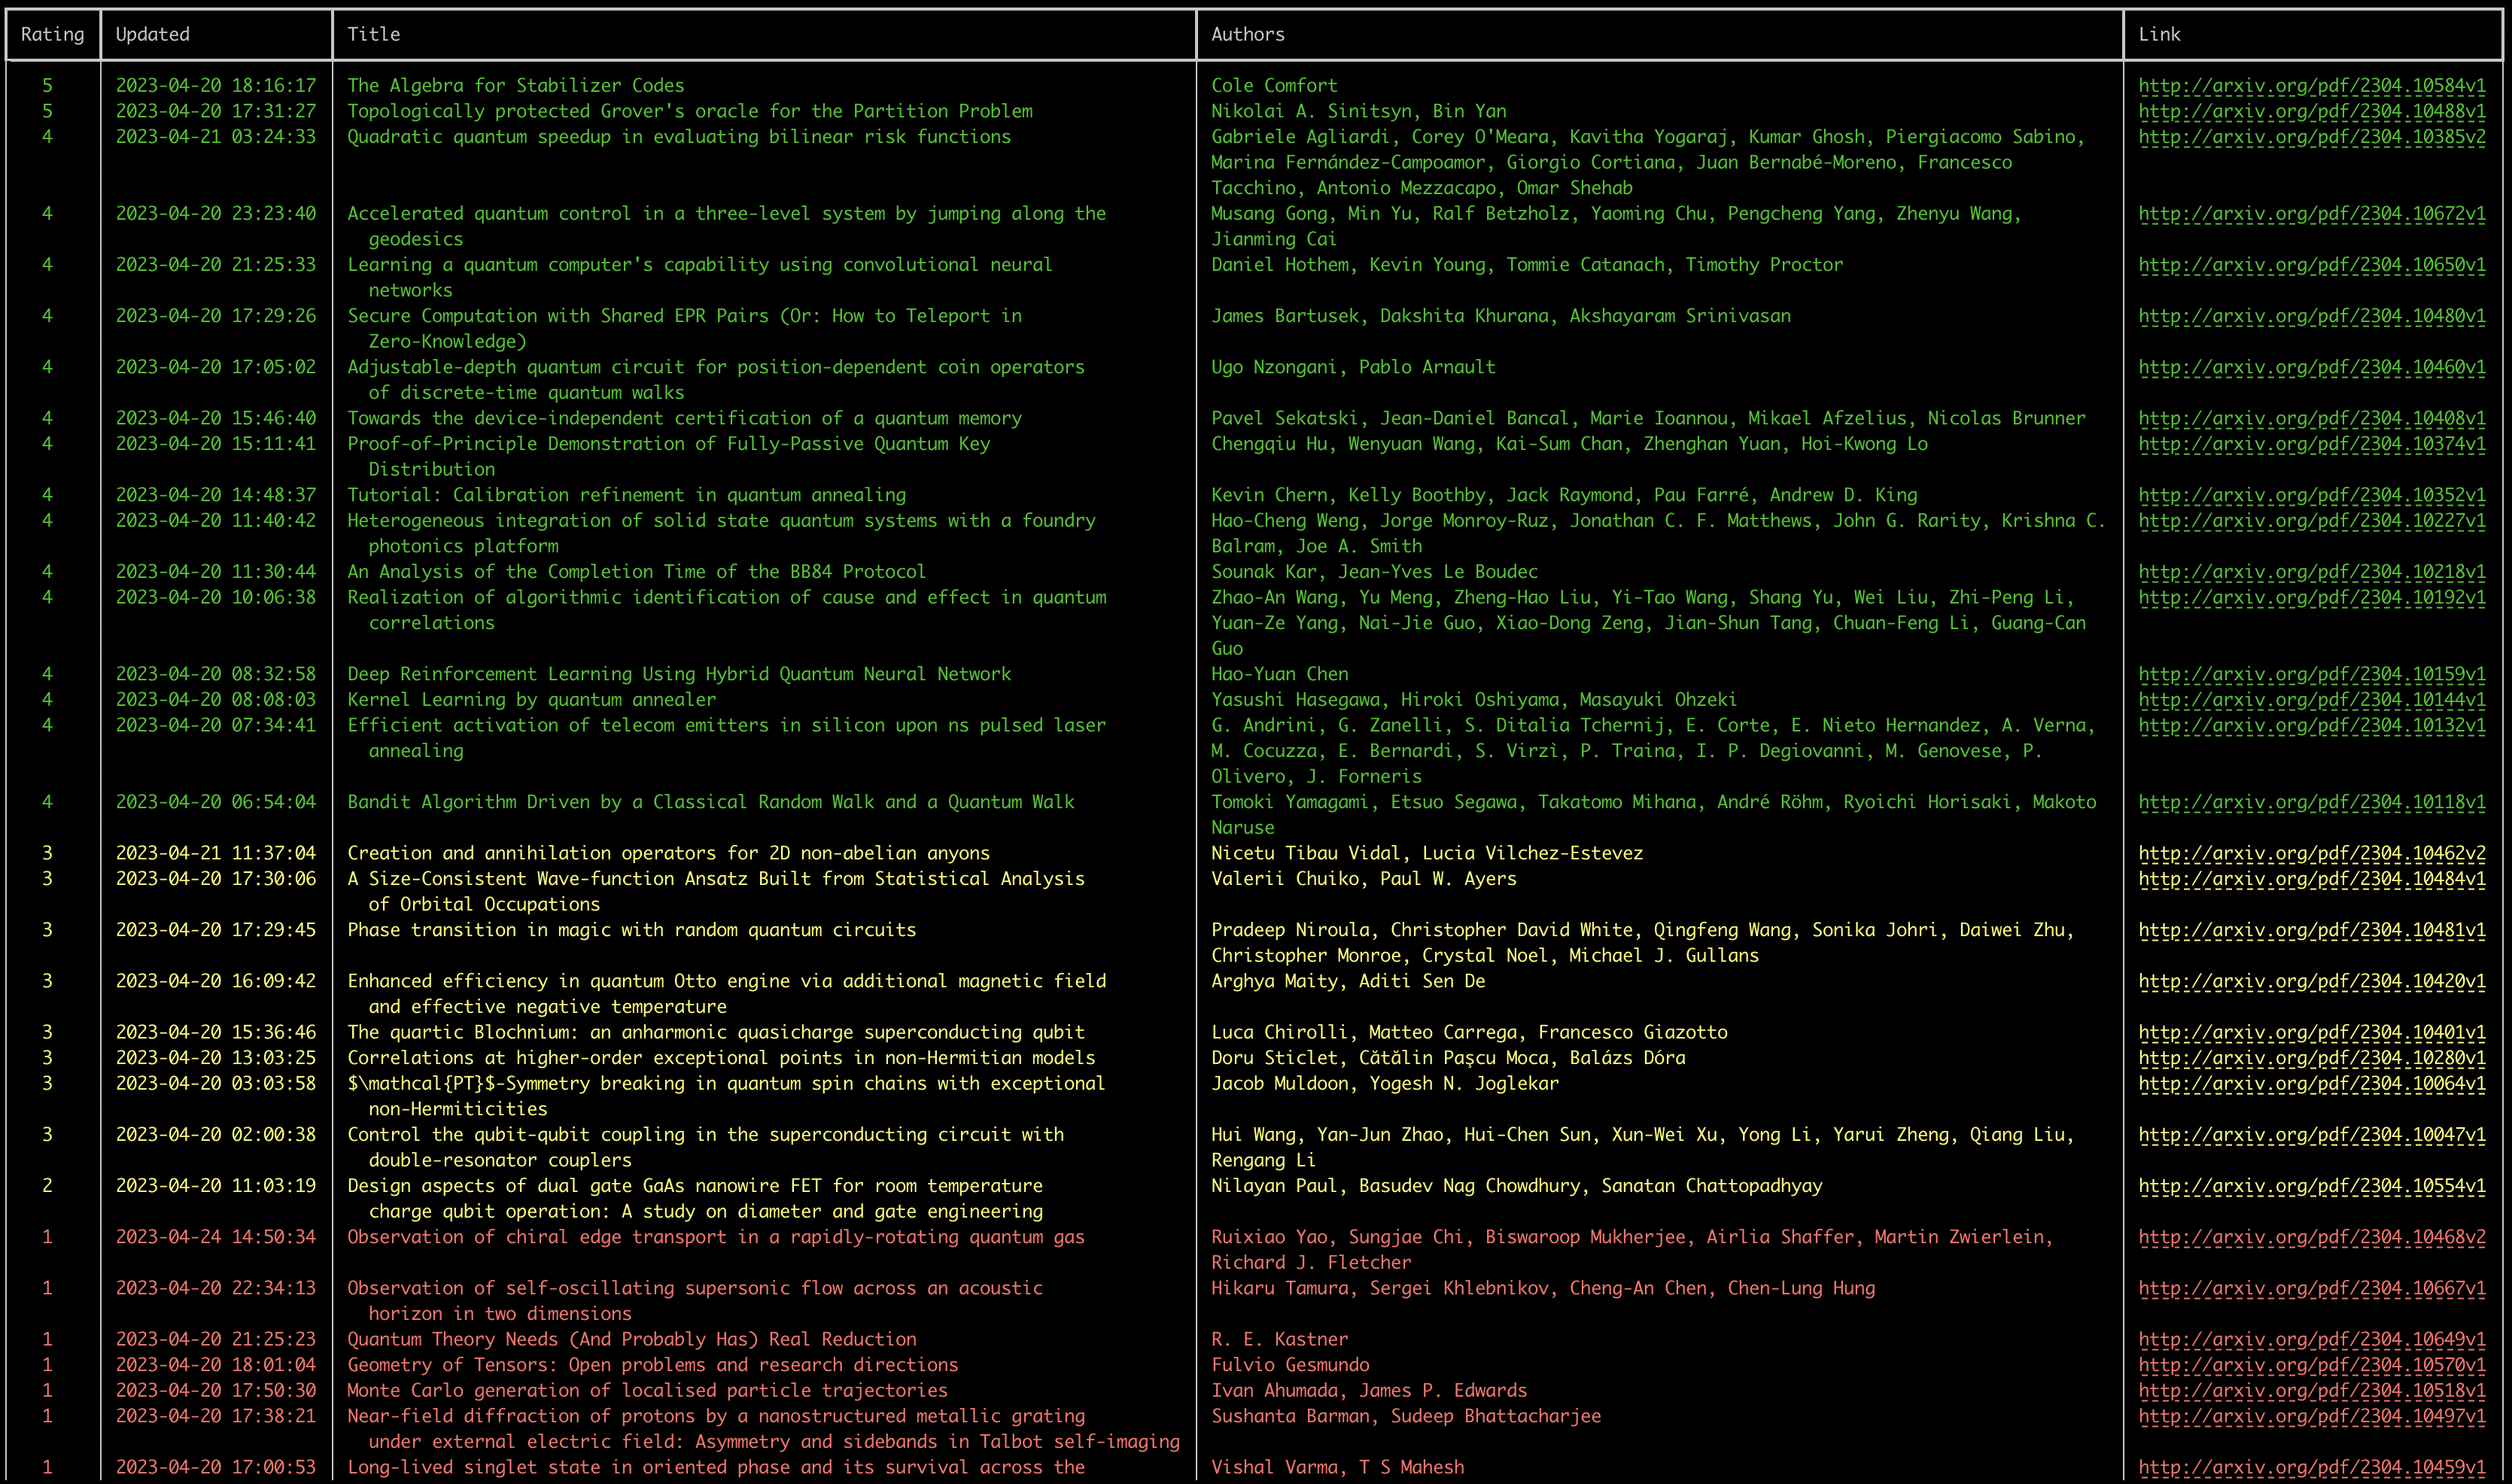
As you can see - given the constraints we set on the model - the ratings are pretty accurate. The papers that should be interesting to folks interested in programming quantum computers, are really given a higher number.
Final words 🔗
In this article we looked at how easy it is to get started with building AI powered applications hosted in Azure. The source code for this post is available on GitHub.
As a bonus we can also say that the code is actually compatible with “regular” OpenAI API (non-Azure hosted!). The reason is, the API surface of both Azure and OpenAI hosted services is the same. As a result, even if you do not have access to Azure OpenAI Service yet, you can still explore all the ideas discussed here using service offering from OpenAI itself. To do that you need to obtain the API key directly from OpenAI, and then switch our OpenAIClient client instance in the code to use the alternative constructor, where you will pass your OpenAI key (instead of Azure OpenAI Service URL and key).